Dec 302012
 

After another hiatus, I have finally gotten around to getting the USB ports extended to the back of the PiSU as the USB hub pictured in the last post just doesn’t like the Pi.
I had a USB extender bracket normally used for a normal pc similar to this one, except that mine had the 2 USB ports as separate plugs.

The pins on the plugs could be removed from the black plug so that I could wire each pin onto the corresponding pin on a USB plug. I ended up with something like this –

IMAG0214

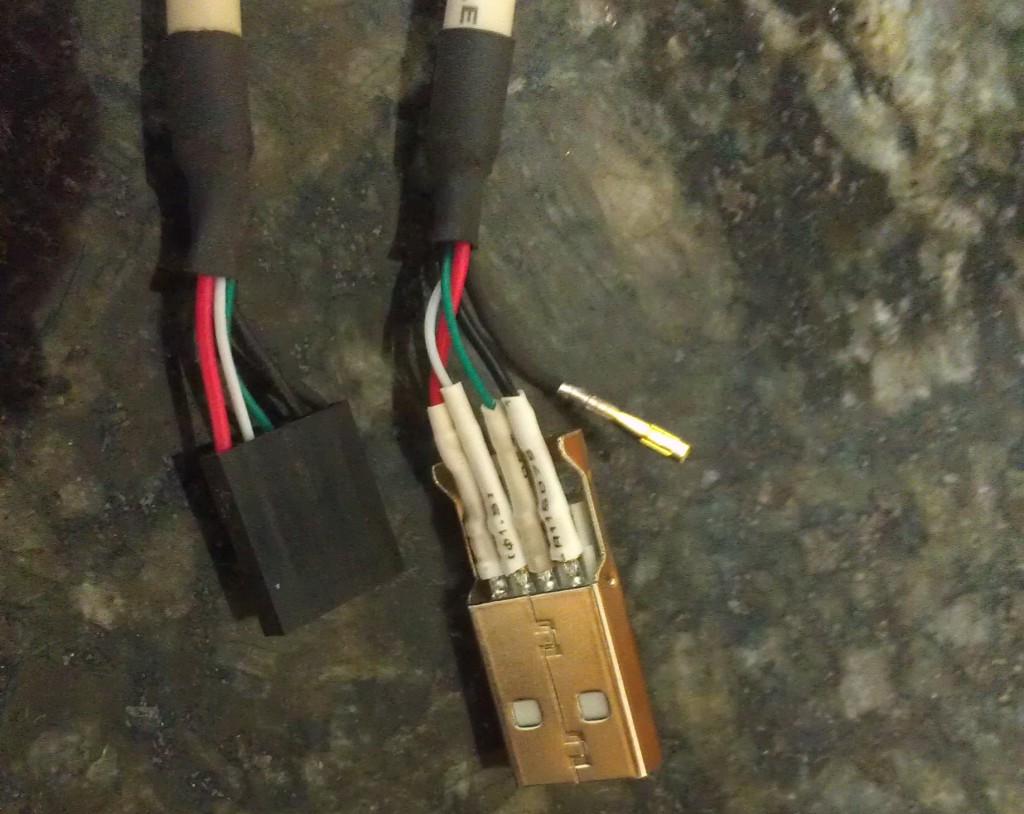
This made extending the USB ports very easy in comparison to other ways which can involve desoldering the USB ports and soldering pins in, though this does take up quite a bit more real estate.
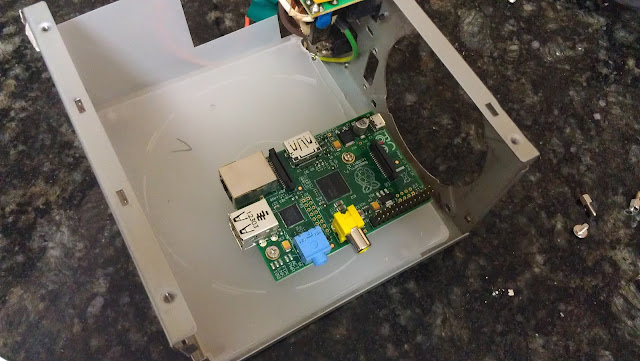
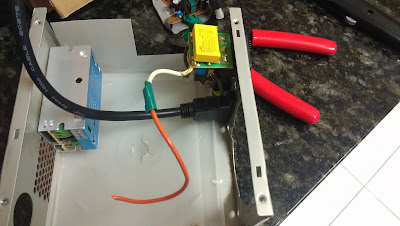
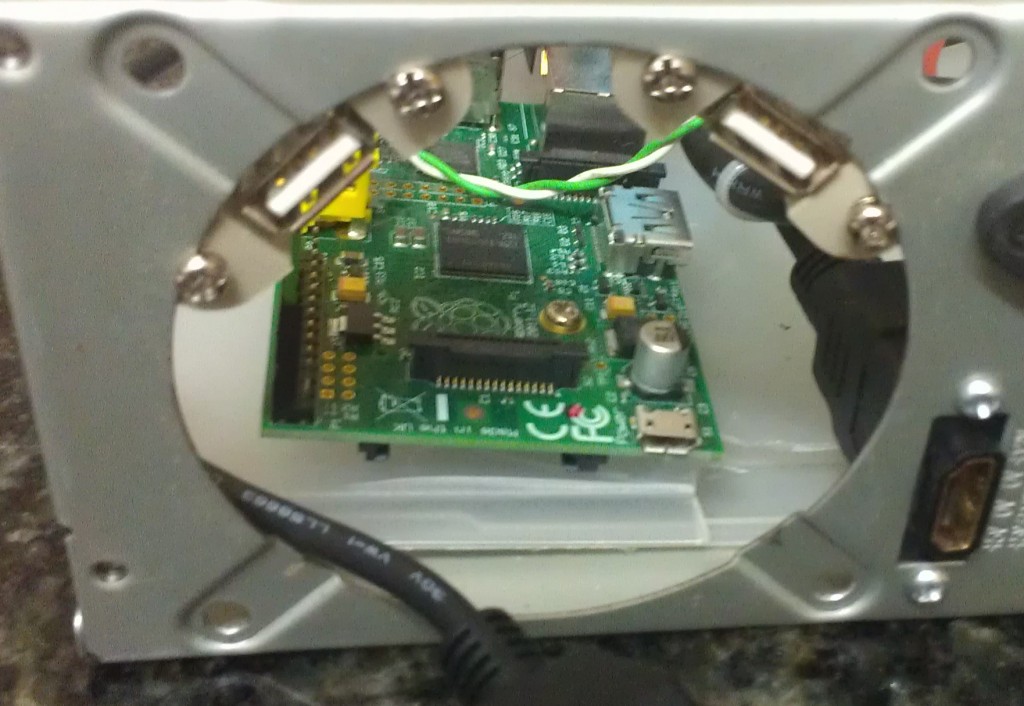
Once the USB plugs were wired up, they fit into the Pi inside the PSU snugly.

IMAG0215

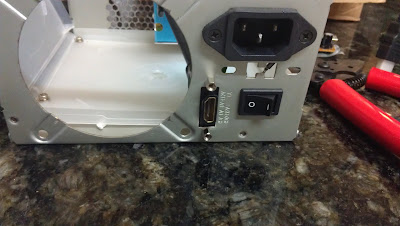
I still haven’t made a blanking plate for where the fans were, so in the meantime I’ve just mounted the USB ports to the outside of the fan cutout with the screws. They hold steady enough that I don’t need to hold the USB port to plug a device in.

IMAG0216

In other news, the HDMI extension doesn’t seem to work with the Raspberry Pi so I have just left it out for now. The extension does work with another HDMI device though so the cable itself works, could be something to do with the Pi itself but I’ve left that for now. If you have any ideas about the extension cable, please leave a comment so I can try and resolve the issue. But in the meantime, the PiSU is almost complete, except for those blanking plates haha.

Share
Oct 302012
 

So after a long hiatus, I have finally gotten around to almost finishing the PiSU.
I ended up ordering a 512MB Revision 2 Raspberry Pi for the mounting holes and also because the socket on my first Pi broke.

The first thing I did was to test mount the RPi by itself with motherboard standoffs screwed into the base.
Mounted Pi
There is a lot of flex in the CD case mounting that I used, not sure if that’s a good thing or a bad thing yet.

Next, I put the HDMI extender, and Power Supply back in, and also plugged in the Ethernet extender. There is *barely* enough space between the front of the PSU and the back of the Pi to fit the Ethernet extender in but with a big of wiggling and cursing, I managed to fit it in. I also plugged the USB cable for the USB hub in at the same time with a bit more wiggling and bit more cursing

Once everything was in place, I screwed the top back on and double sided taped the USB hub on top so that it’s easy to transport.

This is what it looks like at the moment.

Hopefully later on I’ll add some plastic plates to cover the fan holes and be able to mount the USB hub inside the PSU rather that on top and also mount the ethernet extender to the plastic plate.

Share
Sep 072012
 

So I recently received the Power Supply and HDMI extender panel mount socket.
This is how the power supply sits. I’ve mounted it into the case with some screws into the grill of the PSU Case.
PiSU Power Supply

There are mounting holes on the power supply itself which makes it pretty easy to mount it.
The HDMI extension also fits PERFECTLY into the external molex plug that the power supply had before.

This is how it looks from the back of the case.
PiSU HDMI Rear View

The cable for the port extender is a lot longer than it needs to be…problematically long actually.
PiSU HDMI

I did a test fit with the Pi, it seems like the cable won’t be a very good fit.
Not sure if I should start looking for another housing or keep trying to cram the PI into the PSU.

This is how the Pi sits in the case at the moment

Not as much space as I thought I would have initially.
I might try to make up some brackets for the Pi, or cut some slots into the buttom and mount it upright against the side rather than flat on the bottom and see how that pans out. Not sure yet.

Share
Sep 052012
 

I have an old Antec PSU case that I am converting into a case for my Raspberry Pi.
Currently, it looks like this.

It consists of a 5V 1A fake HTC Charger, connected with a short USB cable. I have kept the IEC power plug so that the Pi can use a normal IEC power cord. The Pi is sitting in some styrofoam, which in turn is sitting on a CD case that I have screwed into the Power supply. The CD case will act as the mounting for the Pi later on.

I have the following items coming in the mail so that I can put them into the case to make it a bit easier to work with.

5V 2A Power Supply
HDMI Extension with Panel Mount
USB WiFi Adapter (RT5370)
Small Voltmeter
SD Card Reader
7 Port USB Hub

The plan is to solder the SD card reader straight to the SD card slot via a ribbon cable, and then mount the SD Card reader outside the case so that I can swap SD Cards easily.
The voltmeter will sit between the Power supply and the USB Hub and Pi itself to make sure that the power supply is supplying enough juice.
The 7 Port USB hub will have the USB cable connected to the Pi, but only the D+ and D- wires will be connected to the Pi. The VCC and GND wires will actually be connected to the PSU.

The USB Wifi adapter will be plugged into the Hub to give the Pi WiFi access. As the Pi will be mounted internally within the PSU, the HDMI extension cable will be used to bring out the HDMI port to the back panel. The USB hub will also be used in that manner by being mounted close to the back so that the USB ports will be accessible.

Ethernet can also be brought out by a similar extension, but I’ll be using WiFi mainly so I haven’t gotten that planned
Once I get all the stuff in the mail, I can start putting it all together !

Share