May 282015
 

I recently saw a $5 NAS at my local MSY store. At first I couldn’t believe my eyes, $5 for a NAS?
Surely they were mistaken, and the price was just an error. But sure enough, it scanned as $5 and I was on my merry way shortly after I paid for it.

When I got home, I inspected my Cheap and Nasty find – a Ritmo branded external hard drive enclosure that could be connected via LAN or USB.
Ritmo CE-3590

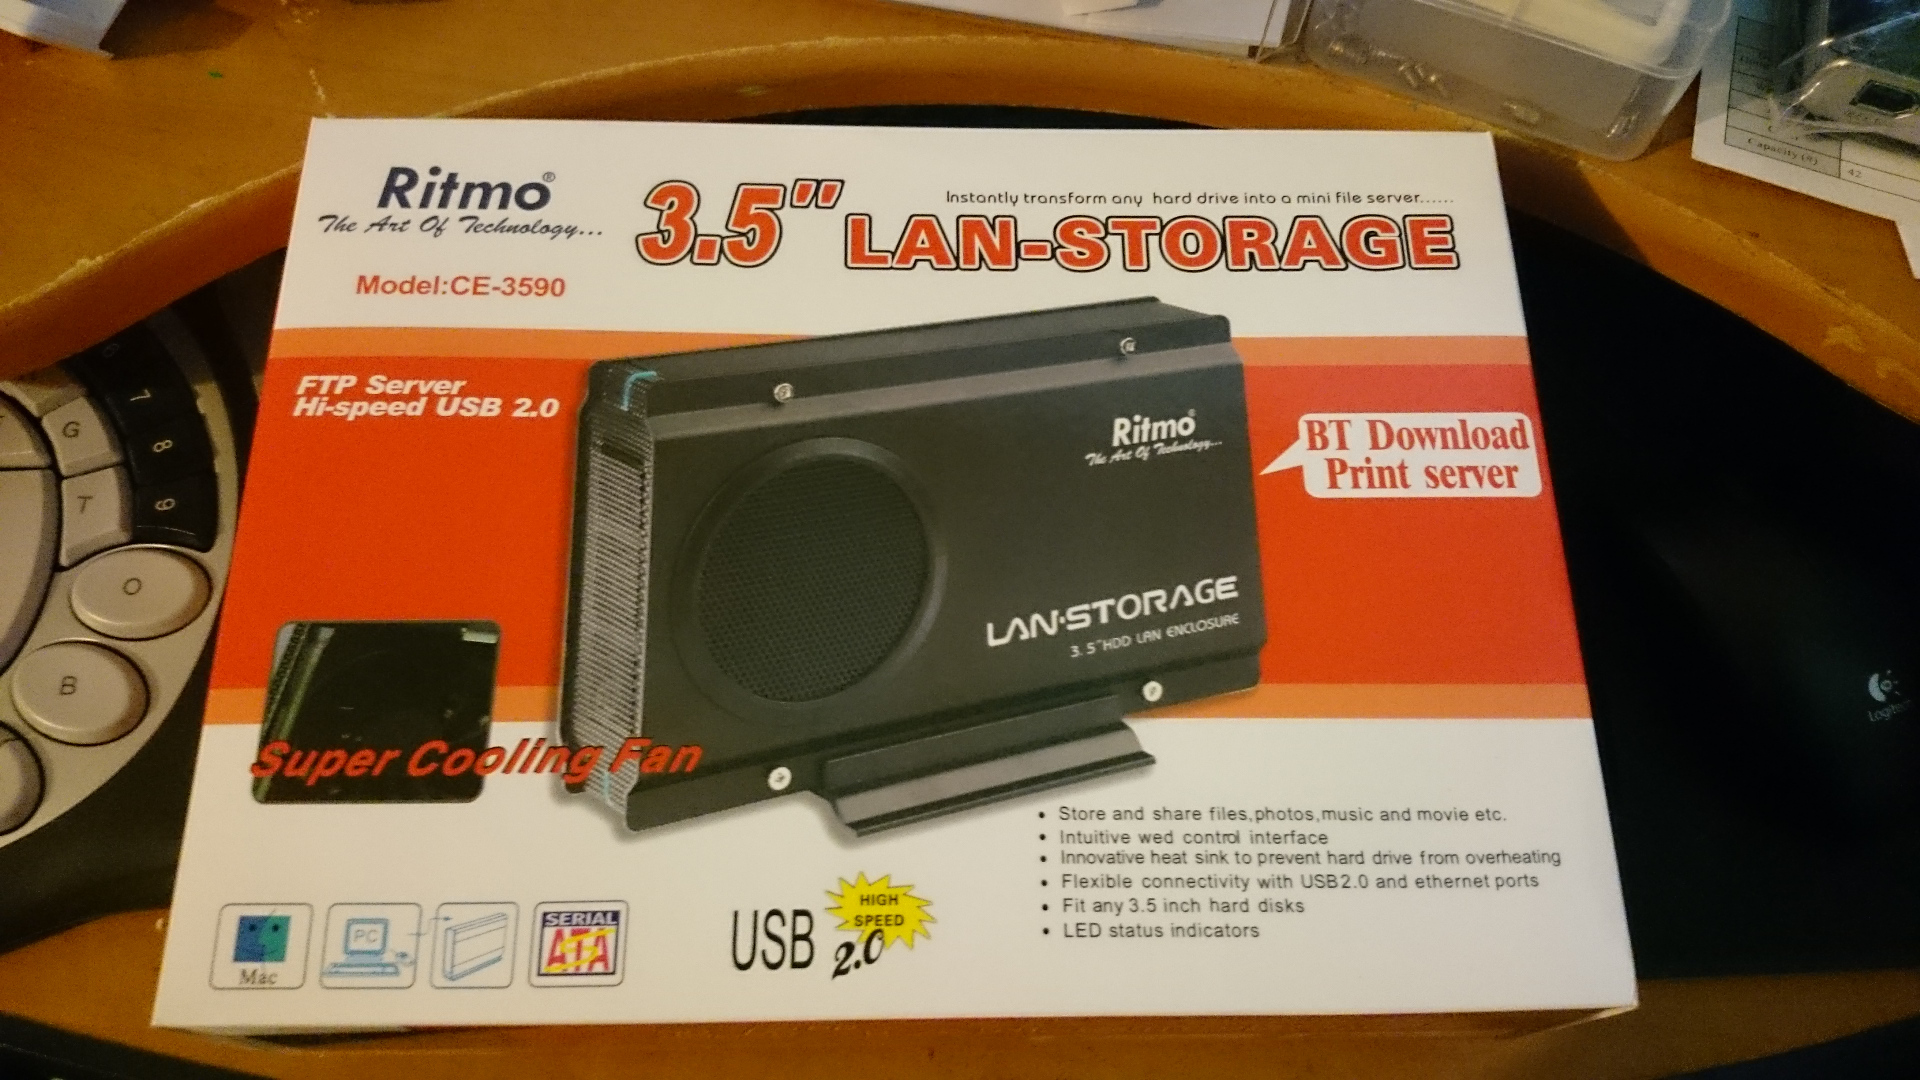
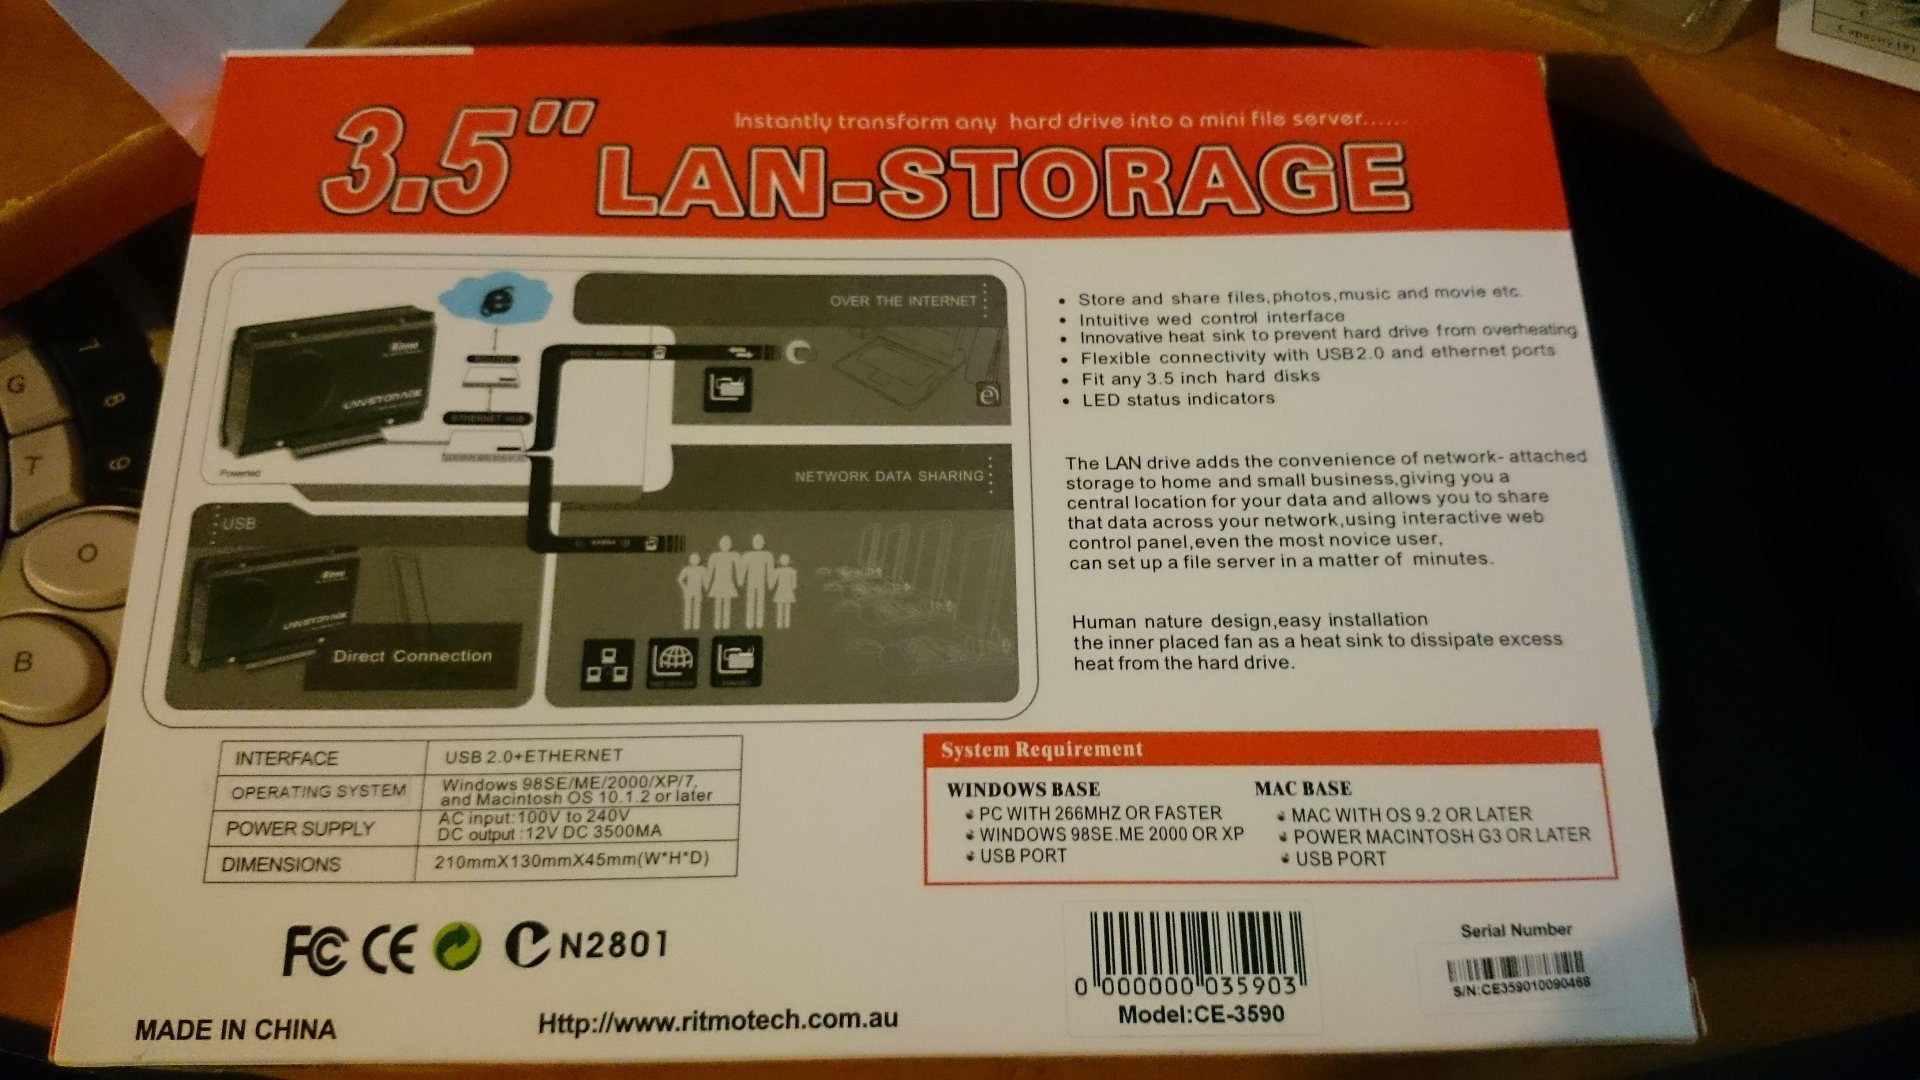
The box tells me that it can Store and share files, has an intuitive “wed” (I think they mean web…) control interface, a heatsink to prevent the drive from overheating, can connect with both USB and Ethernet, fits any 3.5 inch hard disk, and has LED Status indicators.

Ritmo CE-3590 back

Let’s open the box shall we?
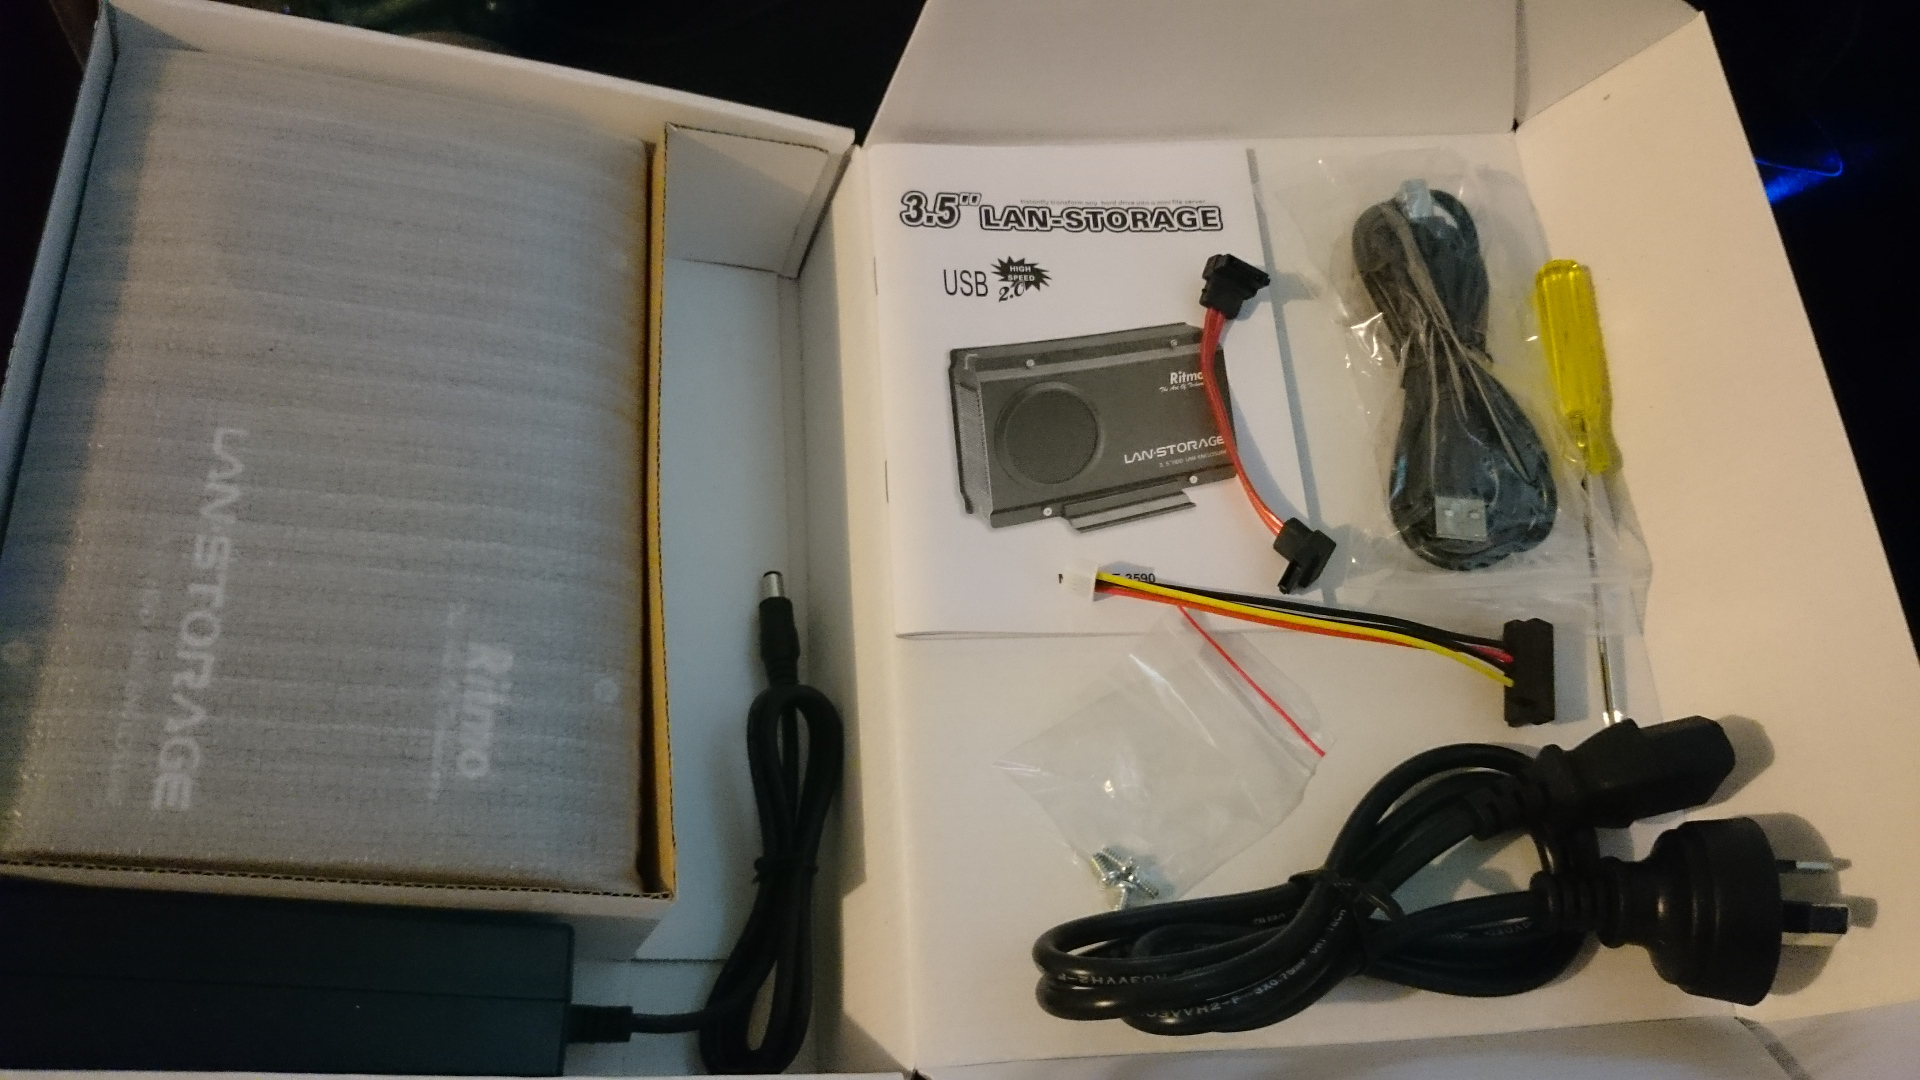
Contents of the box

Inside, you get:

  • The NAS itself
  • A yellow handled screw driver
  • 4 Hard drive screws
  • A short SATA Data cable
  • A short SATA Power cable
  • A standard kettle power cord
  • A 12V 3.5A power brick
  • An instruction manual
  • NAS Stand
  • Drivers CD
  • Ethernet Cable

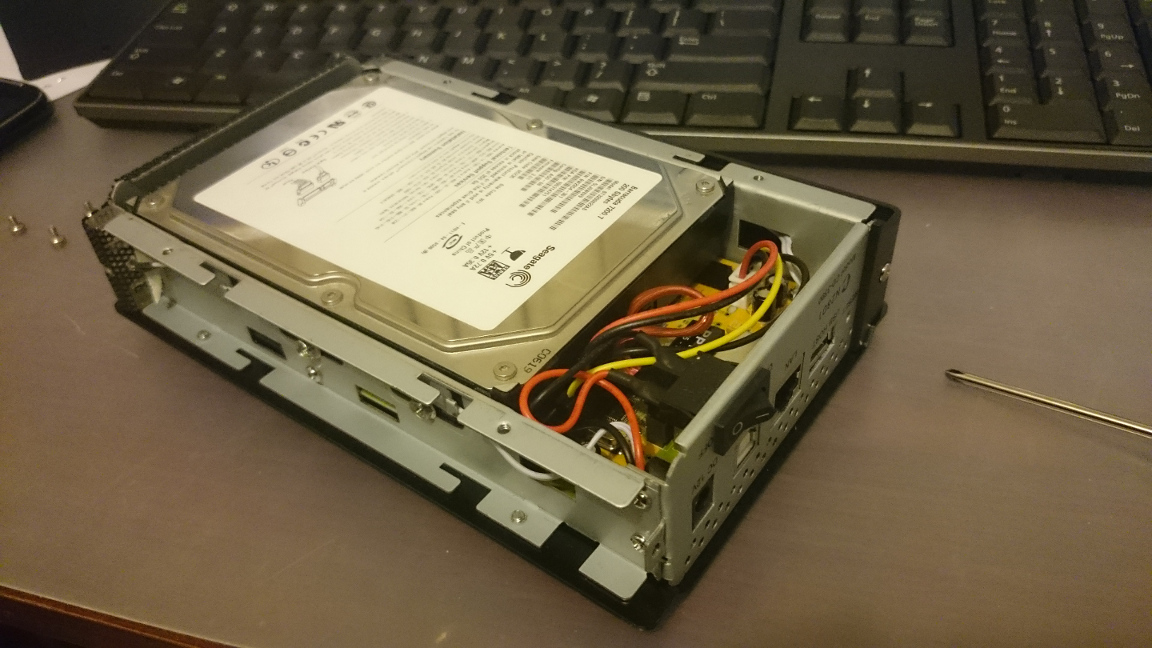
Installing a hard drive is a simple matter of undoing the 4 screws on the blank side of the nas, undoing the 2 screws on the back side of the NAS, and then sliding out the side covers. On the side of the NAS are the mounting holes for the hard drive.
Uncovered NAS

It's flashing at me...
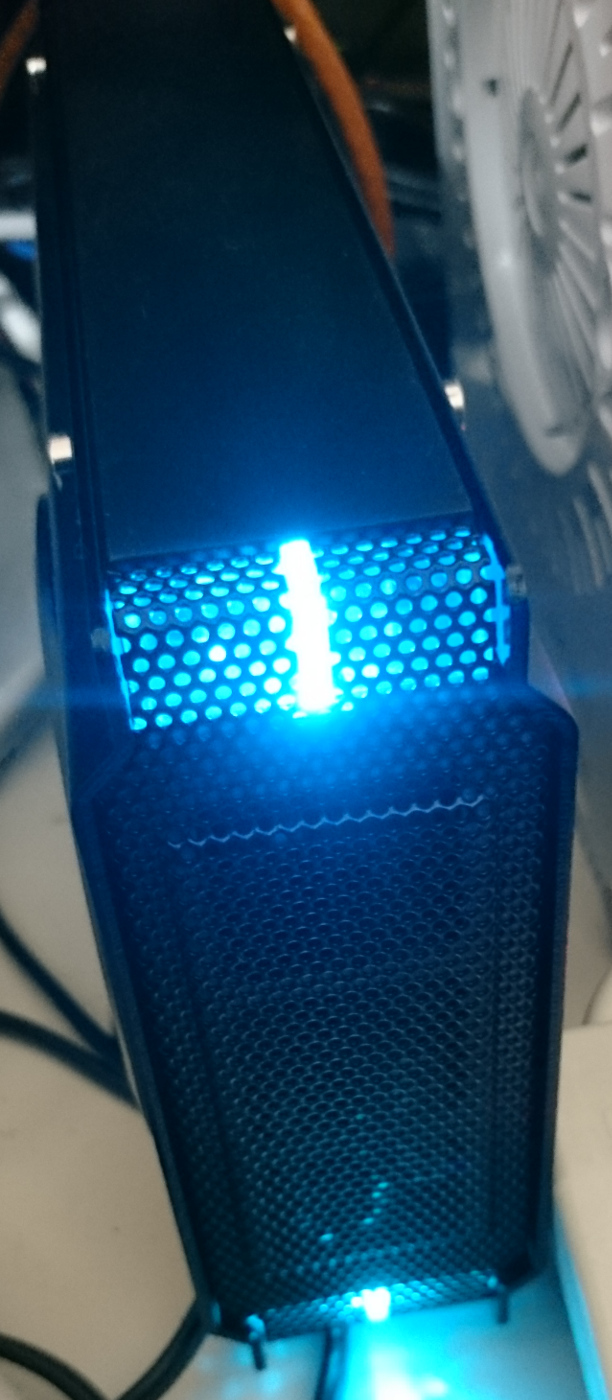
After installing the hard drive and re-installing the covers, I connected the NAS to my network, and to its power supply, plugged it in and powered it on. I was expecting a bang, but was (un?)pleasantly disappointed. The NAS boots up with some bright blue lights on the front to indicate that it is powered on and ready to service me.

I got the NAS IP address from my router, and logged onto the web interface.
I was greeted by something that looked like it was from 1999.
Wow. Much New

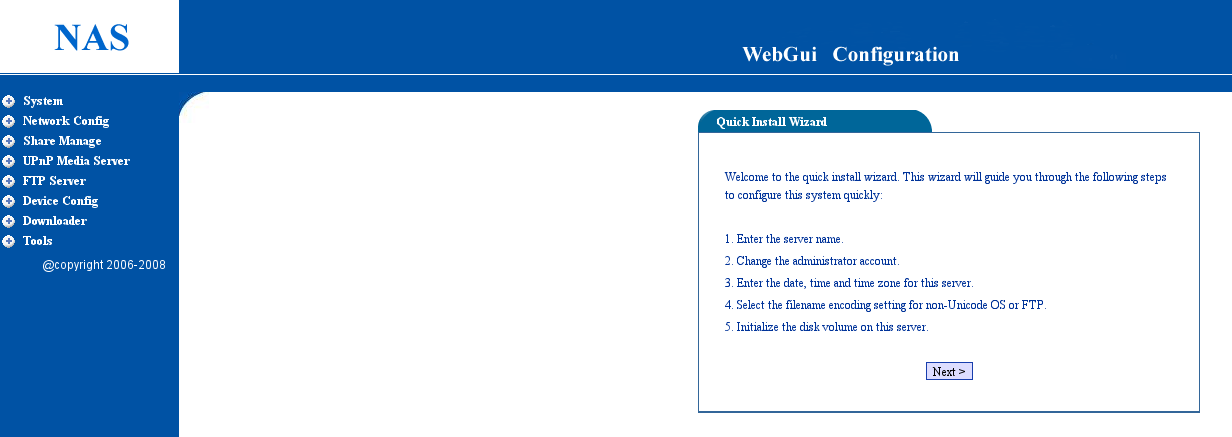
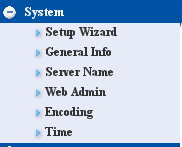
I skipped the installation wizard to jump straight into the guts of the NAS. On the left hand menu under System, I could set up the Web Admin username and password, set up the time of the NAS, and also set up some other options on the NAS itself.
System Menu

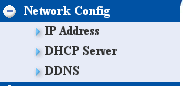
The Network Config menu let me set whether the NAS uses DHCP to get its IP address or I could set a static IP for the NAS. It also comes with a DHCP server and a Dynamic DNS client, however the client seems to only be for changeip.com.
Network Menu

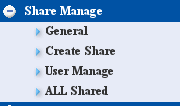
The Share Manage menu lets me configure the Windows shares on the NAS. Since I don’t have many Windows machines, I haven’t set any shares up.
Share Menu

The UPNP server lets me set up where the DLNA server will get its media from. This seems to work well enough to stream SD content. Some HD Content seems to stream with a bit of jitter, but otherwise still watchable.
DLNA Menu

There’s also a FTP Server setup. This is what I’ve been using to get files on and off the NAS.
FTP Menu
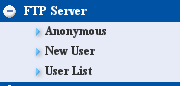
Performance of the FTP server is rubbish, however for $5, what can you expect?
I tested the speed by copying a 100 megabyte file to and from my desktop computer.
I got a fairly constant 5 megabytes a second when I was copying to the NAS.
Copying from the NAS back to my computer was done at a slightly lower 3 megabytes a second.
CPU usage when copying to and from the NAS was quite high, which probably contributes to the low read/write speed.

Device Config lets you see how much space is used on the hard drive, what hard drive is in the NAS, and also allows you to eject the Hard drive…I guess that means that theoretically you could hot swap the drive ? I’m not sure yet.
Device Menu

The Downloader is the Bittorrent client. It seems to be included just so it can be advertised as a feature. The CPU on the NAS itself won’t be able to do more than 1 bittorrent download at a time. I added 2 torrents to the list and the CPU was pegged at 100% the whole time the 2 torrents were downloading.
Downloader Menu

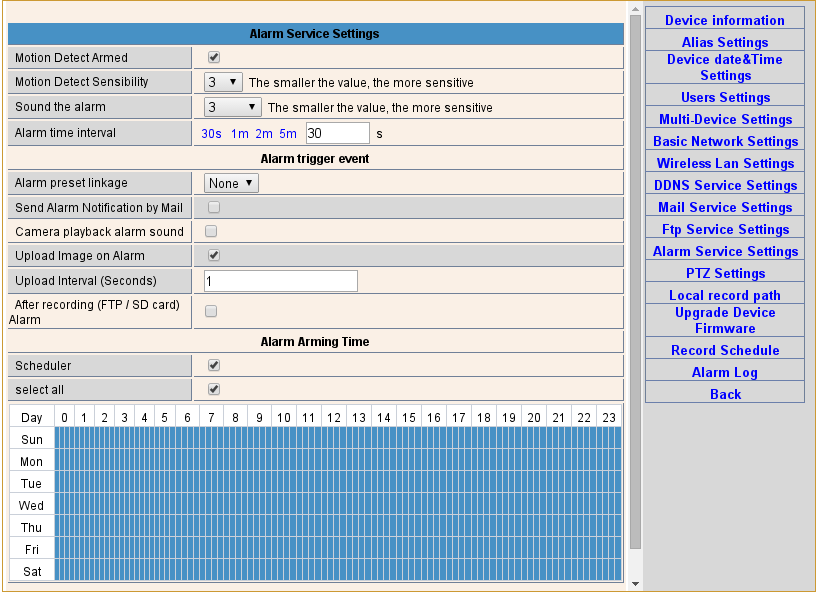
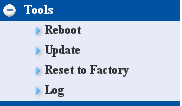
The tools menu allowed me to reboot the NAS, update it (No idea where I would get firmware from), Reset it to factory defaults, and show the log file. My log file seems to only contain logs from the FTP server.
Tools Menu

For $5, this is a bargain, if the power supply holds up. There are features on the NAS that are actually useful, even though this NAS seems to be from 2010 judging from the firmware version. I’m using it to store some files that aren’t important enough to backup, but take enough space on my desktop to bother me. It takes a little while for the files to transfer, but once the files are there, the NAS is sitting there happily serving me the files when I need them.

The only feature lacking from this NAS is NFS support. If it had that then I’d be a happy camper, but even without NFS support, it serves its purpose of sharing out an old 200GB SATA drive that I had lying around doing nothing.

Tune in next week to see what else I can make this NAS do

Share
May 252015
 

For my current task at work – moving away from CA Spectrum to Zabbix – I’ve had to integrate NMIS with Zabbix for SMS alerting as we wanted all alerts to filter through Zabbix for easy tracking of SMSes, and also for the ServiceNow integration functions that I have built into my Zabbix instance.

To build the integration between NMIS and Zabbix, I had to create a custom script that NMIS would call which would then send an SNMP trap to Zabbix for processing.

On the Zabbix side, I needed to set up snmptt to process the traps so that Zabbix will recognise them as traps and action them as alerts.

The following sections will detail the bits I’ve setup to get this integration working

NMIS Configuration

NMIS Alert Script

This script is what NMIS calls when an alert is generated.

I’ve named this script “snmptrap.pm”, it’s based off the example script in /usr/local/nmis8/lib/Notify on the appliance.
If you name it something different, make sure you update the relevant lines in the script file.

package Notify::snmptrap; ## Update this if you change the name

require 5;

use strict;

use vars qw(@ISA @EXPORT @EXPORT_OK %EXPORT_TAGS $VERSION);

use Exporter;
use JSON::XS;
use File::Path;
use Net::SNMP;

$VERSION = 1.00;

@ISA = qw(Exporter);

@EXPORT = qw(
snmptrap ## Update this if you change the name
);

@EXPORT_OK = qw( );

my $dir = "/tmp/customsnmptrap"; ## This is the log directory, and can also be changed

sub sendNotification {
my %arg = @_;
my $contact = $arg{contact};
my $event = $arg{event};
my $message = $arg{message};

my $trapdestination = "10.0.0.5"; ## This should be your Zabbix server IP Address
my $trapcommunity = "public"; # Use your community string here
my $oid = "1.3.6.1.4.1.4818.1"; # I've used the OPMANTEK MIB OID here, but you can use your own if you want

if ( not -d $dir ) {
my $permission = "0770";

my $umask = umask(0);
mkpath($dir,{verbose => 0, mode => oct($permission)});
umask($umask);
}

# add the time now to the event data.
$event->{time} = time;

$event->{email} = $contact->{Email};
$event->{mobile} = $contact->{Mobile};

my ($sess, $err) = Net::SNMP->session(
-hostname => $trapdestination,
-version => 1, #trap() requires v1
-port => 162
);

if (!defined $sess) {
print "Error connecting to target ". $trapdestination . ": ". $err;
next;
}

my @vars = qw();
my $varcounter = 1;

push (@vars, $oid . '.' . $varcounter);
push (@vars, OCTET_STRING);

# This is where you set up the variables for the SNMP Trap message
push (@vars,$event->{level}.' : '.$event->{node}.' : '.$event->{element}.' : '.$event->{event});

my $result = $sess->trap(
-varbindlist => \@vars,
-enterprise => $oid,
-specifictrap => 1,
);

if (! $result)
{
print "An error occurred sending the trap: " . $sess->error();
}

my $fcount = 1;
my $file ="$dir/$event->{startdate}-$fcount.json";
while ( -f $file ) {
++$fcount;
$file ="$dir/$event->{startdate}-$fcount.json";
}

my $mylog;
$mylog->{contact} = $contact;
$mylog->{event} = $event;
$mylog->{message} = $message;

open(LOG,">$file") or logMsg("ERROR, can not write to $file");
print LOG JSON::XS->new->pretty(1)->encode($mylog);
close LOG;
# good to set permissions on file.....
}
1;

NMIS Alert Configuration

Now NMIS needs to be setup to call the new snmptrap.pm script when an alert is generated.
To setup NMIS, you’ll need to locate the escalation that requires the SNMP trap.
Open the escalations table by going to Setup --> Emails, Notifications and Escalation.
In the escalation table, find the alert that you need SNMP traps for, and add this to the escalation level that requires traps –
snmptrap:Contact – Replace Contact with a contact in NMIS.

Zabbix Configuration

Once NMIS has been setup to send traps to the Zabbix server, some configuration needs to be done on the Zabbix side.

SNMPTT Configuration

You’ll need to set up SNMPTT to receive SNMP traps from the OID you’re using in the snmptrap script.
In this example, I’m just going to set up a catchall to catch the SNMP traps, however you can use SNMPTT to parse different traps and generate different alerts.

Create a file in /etc/snmp called snmptt.conf.catch
In that file, put the following lines in
EVENT general .* "SNMP Catchall" Normal
FORMAT ZBXTRAP $aA $ar

You’ll also need to modify /etc/snmp/snmptt.ini to add the newly created file to the snmptt_conf_files configuration variable.
This can be done by appending the path to the list like this –

snmptt_conf_files = <<END
/etc/snmp/snmptt.conf.catch
END

If there are already lines there, then add the line to the block of text right before the last END

Zabbix Item Configuration

I’ve used the basic snmptrap.fallback method to catch all traps, but you can set up specific alerts in SNMPTT to generate different messages.
On the NMIS server, add an item of type SNMP Trap, and with a key of snmptrap.fallback.
This item will now get any SNMP traps from the Server, you can create a trigger if required to alarm on the SNMP traps, or just keep them for history.

Share
May 212015
 

One of the reason why I bought the IP camera in the first place was to replace a USB webcam that I was using to do some motion detection. The camera was plugged into a virtual machine and wasn’t very reliable so when I saw the IP Camera, it crossed my mind that it would be a nice cheap replacement for the webcam.

The first thing I needed to to do was configure the username and password on the IP Camera itself. This is to ensure that no one can log in to the webcam from the cloud service.

Configuring the IP Camera

I will be doing any setup for the IP Camera on the web interface as it’s a platform agnostic way of setting it up.
Log in to the camera by directing your browser to http://:99/ and entering your password.
The default credentials are “Admin” with a blank password.

Click on sign in on one of the modes, I’ve used the Chrome mode.
Menu

Click on the settings button in the bottom right hand corner, and then click on Users Settings in the right hand menu.
settings button
If you want to, you can change the name of the admin user here, I’ve set a password for my admin user here.
Click on Submit. The IP Camera will now reboot for the settings to take effect.

Configuring Motion

I’ll be using Motion for more than one device so I will configure it using separate configuration files for the camera in preparation for other cameras to also be added in. It’s possible to use a single configuration file if you want, but if there is a possibility of adding more cameras later on, it would be easier to start with multiple configuration files off the bat.

Configuring the Motion Daemon

There’s a few settings that I’ll be changing from the default Motion configuration.
First thing you should change is the line in /etc/default/motion. Change it to read from no to yes.

Next, we’ll have a look at motion.conf.
The following lines in there that I will be commenting out so that Motion doesn’t look for a local device. It’s possible that you don’t need to comment these line;s out, but I prefer to be thorough to ensure nothing unexpected happens.
videodevice /dev/video0
v4l2_palette 17
input -1
norm 0

There’s also a few lines you’ll need to update.
There are a couple of lines that set the resolution. By default, they are at 320 and 240.

width 320
height 240

Update these 2 lines to 640 and 480 like so

width 640
height 480

I’m also going to up the framerate from framerate 2 to framerate 30 to get some smoother video, Keep in mind that this is just a maximum framerate.

We’ll update the server options next so that you can access the control panel from another computer on the network.
There is a couple of lines like this –

stream_localhost on
webcontrol_localhost on

These needs to be changed to off like so –
stream_localhost off
webcontrol_localhost off

At the bottom of the configuration file, you will see some thread lines. We’ll need to uncomment one so we can put the settings for our first camera into one of the files.
From

; thread /etc/motion/thread1.conf

To

thread /etc/motion/thread1.conf

thread1.conf

If you’re only intending to use one camera then you don’t need to create this file, you’ll just need to do the following in the main motion.conf file.

In this file, we’ll need to set the URL for the camera itself.
Put this into a new file named /etc/motion/thread1.conf

netcam_url http://192.168.2.16:99/videostream.cgi?user="YOUR ADMIN USER HERE"&pwd="YOUR ADMIN PASSWORD HERE"

Replace the username and password with your own.
Save the file, and then you should be able to start motion with /etc/init.d/motion start
Then, using a player like VLC and browsing to the address of the computer running motion on port 8081 should get you a stream of the IP Camera.

Share
May 182015
 

One of my current projects at work is to build up Zabbix as an alerting solution.
This includes using Zabbix to raise incidents in ServiceNow for any alerts that come through.

Initially, I thought that I would need to do lots of scripting, but it turns out I only had to write a simple script to allow Zabbix to raise incidents in ServiceNow.
This was largely thanks to pre-built Python modules that the community have built to allow easy integrations, namely ZabbixAPI and Python-Servicenow.

These 2 libraries made integration easy because they allowed me to concentrate more on the code to join the 2 systems rather than having to figure out how to make them talk to Python, and then talk to each other.

The integration itself will take an alert that is generated by Zabbix and insert the data into ServiceNow as an incident.

Configuring Zabbix

  1. Copy the snippet at the bottom of this post into a file in /usr/lib/zabbix/alertscripts. I’ve named mine servicenowapi.py.
  2. Create a new Media Type.
    Create a new media type by going to Administration => Media types, and click on Create media type.
    Give the Media Type a name, select Script for the Type, and put in the name of the file. Using my example, it would be servicenowapi.py
  3. Assign the new Media Type to a user.
    The user’s “Send to” for the media type will define the assignment group in ServiceNow.
    Click on Administration => Users, select Users in the drop down on the top right, and click on a user. Once you’re in the user’s configuration page, click on the Media tab, and then click on ‘Add’.
    Select the new Media Type from the type drop down, and then enter in the ServiceNow Assignment Group in the ‘Send To’ box, and click ‘Add’.
  4. Create or modify an existing action to start sending incidents to ServiceNow.
    Click on Configuration => Actions, and open up an Action. Click on the Operations Tab, and click on “New”.
    Click on “Add” in the Send To Users section, and choose the user that has the ServiceNow Media type set up.
    Select the ServiceNow action in the “Send only to” box, and then click on the “Add” button to add the action to the list of actions.
    Once the action has been setup, click on Save.

Once the alert is all set up, whenever the alert is triggered, the script should log an incident directly into ServiceNow.

servicenowapi.py

The below code should be copied and pasted into a file to be used as the script for the Media Type.

#!/usr/bin/python
import zapi
import datetime
import sys
import urllib2
import os
import servicenow.Connection
import servicenow.ServiceNow

##
## I've used logging for my own setup, but I've commented it out so that it won't spam a log file unless you uncomment it.
## Just make sure the location that you're storing the logfile is writable by the zabbix user
## In this example, I've used /usr/lib/zabbix/logfiles but this could be anywhere writable by the zabbix user
#f = open('/usr/lib/zabbix/logfiles/snow.log','a')
#f.write('\n\nScript Start :: '+datetime.datetime.now().ctime()+'\n\n')
#f.write(','.join(sys.argv)+'\n')

## Zabbix Passes the details via command line arguments.
assignmentgroup = sys.argv[1]
description = sys.argv[2]
detail = sys.argv[3]

## Set Up your Zabbix details
zabbixsrv = "127.0.0.1"
zabbixun = "Admin"
zabbixpw = "zabbix"

## Set up your ServiceNow instance details
## For Dublin+ instances, connect using JSONv2, otherwise use JSON
username = "username"
password = "password"
instance = "instance"
api = "JSONv2"

## I've configured Zabbix to only pass the Event ID in the message body.
## If you want more detail in the body of the incident in ServiceNow, you'll need to make sure that eventid is parsed out of detail correctly.
eventid = detail

#f.write('trying to connect to servicenow\n')
try:
conn = servicenow.Connection.Auth(username=username,password=password,instance=instance, api=api)
except:
print "Error Connecting to ServiceNow\n"
#f.write("Error Connecting to ServiceNow\n")

#f.write('trying to create incident instance\n')
try:
inc = servicenow.ServiceNow.Incident(conn)
except:
print "Error creating incident instance\n"
#f.write("Error creating incident instance\n")

#f.write('trying to create new incident\n')

## This is where the fun starts.
## You'll need to set up the following section with the correct form fields, as well as the default values
try:
newinc = servicenow.ServiceNow.Incident.create(inc, { \
"short_description":description, \
"description":detail, \
"priority":"3", \
"u_requestor":"autoalert", \
"u_contact_type":"Auto Monitoring", \
"assignment_group": assignmentgroup})
#f.write("\n\n"+str(newinc)+"\n\n")
except Exception as e:
print "Error creating new incident in ServiceNow\n"
print str(e)
#f.write("Error creating new incident in ServiceNow\n")
#f.write(str(e)+"\n")

## This script will retrieve the new incident number from servicenow and put it back into zabbix as an acknowledgement
try:
newincno = newinc["records"][0]["number"]
except:
print "unable to retrieve new incident number\n"
#f.write("unable to retrieve new incident number\n")

zabbix = zapi.ZabbixAPI(url='http://'+zabbixsrv+'/zabbix',user=zabbixun,password=zabbixpw)
zabbix.login()
#f.write('Acknowledging event '+eventid+'\n')
zabbix.Event.acknowledge({'eventids':[eventid],'message':newincno})

#f.write('\n\nScript End :: '+datetime.datetime.now().ctime()+'\n\n')
#f.close()

Share
May 142015
 

The OfficeOne IP Camera that I recently reviewed has the ability to periodically upload files to an FTP server.

This post will be on how to configure the camera itself to upload to an FTP server, which is pretty straight forward. All of the configuration will be done through the web interface to ensure cross platform compatibility.
I’ll also go over some of the other options of the FTP uploads.

Configuring the FTP Settings

  1. Navigate to your Webcam’s IP address. You can find this easily through the Search Tool if you’re using Windows. I believe OSX may have one on the application CD as well, however I don’t have a OSX device to test with.
  2. Login with your admin credentials…You’ve changed them, right ?!!?
  3. Click on FTP Service Settings
  4. Enter in your FTP server IP Address, and FTP Username and password.
  5. Click on Submit
  6. Click on Test to make sure that you get a Test ... Succeed message

If you don’t get a Test ... Succeed then try to access the ftp server with a client like FileZilla to make sure that the FTP server is running properly. It’s also a good idea to test that the user that you’re setting up can upload to the FTP server with FileZilla.

Uploading Continously

Once the FTP settings are set up correctly, you can set up the interval that the camera will wait between sending an image to the FTP Server.
This will continuously upload pictures to the FTP server so you can see any activity that’s happened regardless of motion being detected or not.
Setting the interval for 1 second results in approximately 3 Megabytes of images each minute.

Uploading only when a motion alarm is triggered

To set the camera up to upload only when motion is detected, you’ll need to set it up in the Alarm Service Settings.
In the Alarm Service Settings, tick the Upload Image on Alarm box, and then enter in an interval that the camera will upload to the FTP Server.
You will also need to select the times that the motion detection will be activated. In this screenshot, I have selected all the times so it will always upload to the FTP server.
Alarm Service Settings

To also get Video recordings uploaded, tick the After recording (FTP / SD card) Alarm box. However the video is in a .h260 format which I have not worked out how to view outside of the cam’s built in viewers just yet.

That’s It!

That pretty much covers the options of FTP Uploading from these cameras. Just simple images and/or videos from the cam itself to the FTP server. An SD Card is not required for this function to work either so you could potentially have a NAS to record everything the IP Cam sees if required.
If there’s anything I missed, feel free to drop me a comment and I’ll try to cover it in future posts.

Share