Jul 092015
 

So after poking around with the bootloader, I decided to go look for the stock firmware to see if I could upload that with some modifications so I could play around with the stock system.

After a night of Googling, I couldn’t find any links to the original firmware. I tried to discover if I could download the firmware from the NAS, but that didn’t get me anywhere either. All the Googling did point me in the direction of SnakeOS however, which is replacement firmware for some NASes. However, it hadn’t been maintained in quite a few years so I was initially a bit hesitant.
Continue reading »

Share
Jul 062015
 

I received my USB to TTL adapter today, so decided to have a look at the NAS and see if I could get root access to it.

The Serial console is actually under where the drive is, so I’ve gotten access to it from the bottom as there’s some plastic between where the drive goes and the port itself.

NAS Connected via Serial

NAS Connected via Serial

As you can see from the picture, I’ve stuck some jumper cords into the serial console port. The Yellow wire is actually the white wire on my USB->TTL converter, the green is still green, and black is still black. With the jumper leads plugged in, I turned the NAS On with screen listening on /dev/ttyUSB0 with a baud rate of 38400.
Continue reading »

Share
May 282015
 

I recently saw a $5 NAS at my local MSY store. At first I couldn’t believe my eyes, $5 for a NAS?
Surely they were mistaken, and the price was just an error. But sure enough, it scanned as $5 and I was on my merry way shortly after I paid for it.

When I got home, I inspected my Cheap and Nasty find – a Ritmo branded external hard drive enclosure that could be connected via LAN or USB.
Ritmo CE-3590

The box tells me that it can Store and share files, has an intuitive “wed” (I think they mean web…) control interface, a heatsink to prevent the drive from overheating, can connect with both USB and Ethernet, fits any 3.5 inch hard disk, and has LED Status indicators.

Ritmo CE-3590 back

Let’s open the box shall we?

Contents of the box

Inside, you get:

  • The NAS itself
  • A yellow handled screw driver
  • 4 Hard drive screws
  • A short SATA Data cable
  • A short SATA Power cable
  • A standard kettle power cord
  • A 12V 3.5A power brick
  • An instruction manual
  • NAS Stand
  • Drivers CD
  • Ethernet Cable

Installing a hard drive is a simple matter of undoing the 4 screws on the blank side of the nas, undoing the 2 screws on the back side of the NAS, and then sliding out the side covers. On the side of the NAS are the mounting holes for the hard drive.
Uncovered NAS

It's flashing at me...
After installing the hard drive and re-installing the covers, I connected the NAS to my network, and to its power supply, plugged it in and powered it on. I was expecting a bang, but was (un?)pleasantly disappointed. The NAS boots up with some bright blue lights on the front to indicate that it is powered on and ready to service me.

I got the NAS IP address from my router, and logged onto the web interface.
I was greeted by something that looked like it was from 1999.
Wow. Much New

I skipped the installation wizard to jump straight into the guts of the NAS. On the left hand menu under System, I could set up the Web Admin username and password, set up the time of the NAS, and also set up some other options on the NAS itself.
System Menu

The Network Config menu let me set whether the NAS uses DHCP to get its IP address or I could set a static IP for the NAS. It also comes with a DHCP server and a Dynamic DNS client, however the client seems to only be for changeip.com.
Network Menu

The Share Manage menu lets me configure the Windows shares on the NAS. Since I don’t have many Windows machines, I haven’t set any shares up.
Share Menu

The UPNP server lets me set up where the DLNA server will get its media from. This seems to work well enough to stream SD content. Some HD Content seems to stream with a bit of jitter, but otherwise still watchable.
DLNA Menu

There’s also a FTP Server setup. This is what I’ve been using to get files on and off the NAS.
FTP Menu
Performance of the FTP server is rubbish, however for $5, what can you expect?
I tested the speed by copying a 100 megabyte file to and from my desktop computer.
I got a fairly constant 5 megabytes a second when I was copying to the NAS.
Copying from the NAS back to my computer was done at a slightly lower 3 megabytes a second.
CPU usage when copying to and from the NAS was quite high, which probably contributes to the low read/write speed.

Device Config lets you see how much space is used on the hard drive, what hard drive is in the NAS, and also allows you to eject the Hard drive…I guess that means that theoretically you could hot swap the drive ? I’m not sure yet.
Device Menu

The Downloader is the Bittorrent client. It seems to be included just so it can be advertised as a feature. The CPU on the NAS itself won’t be able to do more than 1 bittorrent download at a time. I added 2 torrents to the list and the CPU was pegged at 100% the whole time the 2 torrents were downloading.
Downloader Menu

The tools menu allowed me to reboot the NAS, update it (No idea where I would get firmware from), Reset it to factory defaults, and show the log file. My log file seems to only contain logs from the FTP server.
Tools Menu

For $5, this is a bargain, if the power supply holds up. There are features on the NAS that are actually useful, even though this NAS seems to be from 2010 judging from the firmware version. I’m using it to store some files that aren’t important enough to backup, but take enough space on my desktop to bother me. It takes a little while for the files to transfer, but once the files are there, the NAS is sitting there happily serving me the files when I need them.

The only feature lacking from this NAS is NFS support. If it had that then I’d be a happy camper, but even without NFS support, it serves its purpose of sharing out an old 200GB SATA drive that I had lying around doing nothing.

Tune in next week to see what else I can make this NAS do

Share
Dec 122013
 

In this part, I’m going to go through FreeNAS 9.1.1 from installation to setup and use of the NAS.

FreeNAS has the easiest installation of them all, coming in an .xz file all I had to do was write the image file to the install media – which in this case is a USB thumbstick.

To write the image on a Linux system I used dd and xzcat

# xzcat FreeNAS-9.1.1-RELEASE-x64.img.xz | dd of=/dev/sdh bs=64k

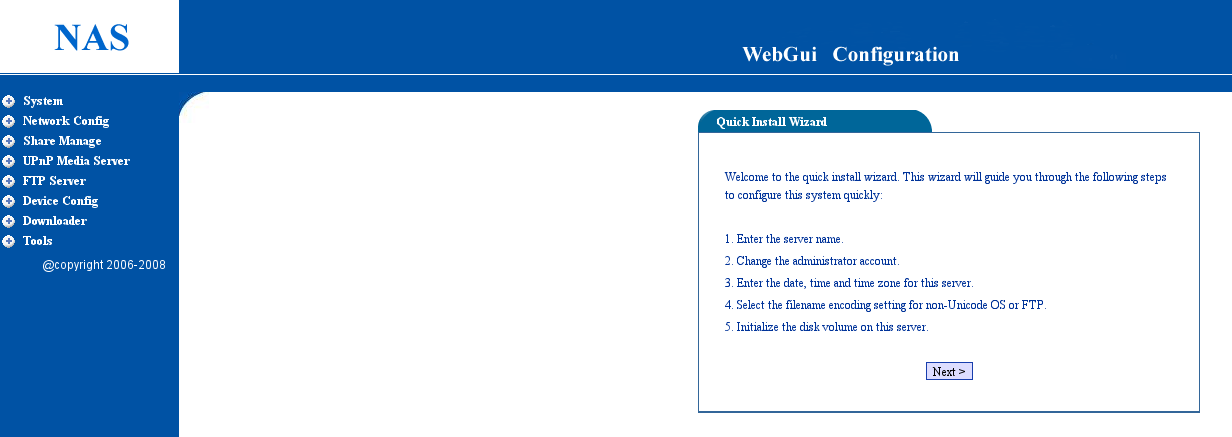
Booting the NAS from the USB stick brings up FreeNAS with it’s web interface running on the normal http port.

Booting after installation took around 8 minutes, though I’m not sure whether it’s my hardware or the USB stick that’s causing the delay, but any bootups after the first one only took around 3-4 minutes.
Keeping in mind though that I had not customised FreeNAS yet, so boot times may be improved by tweaking the settings.

After the NAS booted up, I could access the NAS on it’s web interface using FireFox. Chrome wouldn’t play nice though.

The web interface is very smooth and quick to respond. All configuration can be done from the web interface, from storage operations to networking operations to showing system data. It’s all neatly organised in the menu, with some quick shortcuts along the top. Each function that is opened is opened as a tab, allowing you to flick between tasks quickly and efficiently, without having to navigate through the menu again.

You can see the Reporting, Settings, and System Information Tabs open here

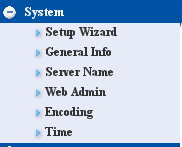
First things first, I had to correct my timezone.
Clicking on the Settings tab at the top provided me some further tabs, as well as the following settings

Updating my Timezone was a simple matter of picking the right one and clicking on save.

Clicking on Reporting shows me a nice graphical overview with some history on the system.

This will allow me to keep an eye on the System to see how well it’s doing under the load of FreeNAS.

I also needed to configure my Default Gateway and Nameserver settings. The DHCP client mustn’t have gotten the settings from my DHCP server.
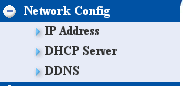
This is also easily done, just by clicking on the Network button at the top, which brings up the Global Configuration

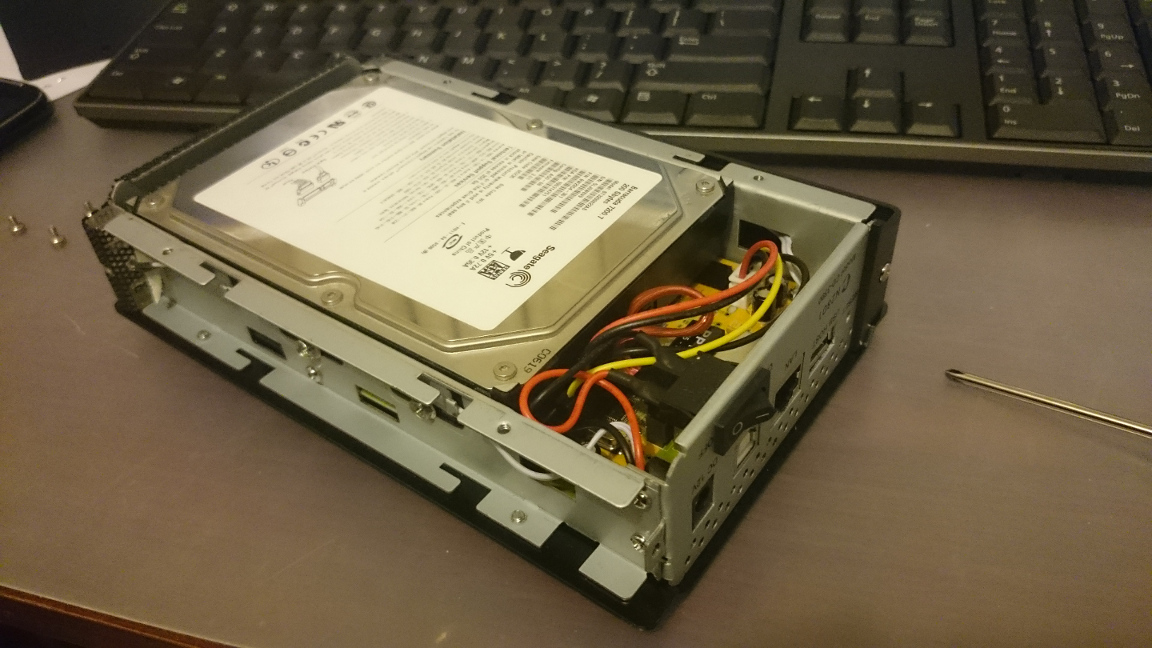
Next up, I’ll need to actually assign my hard drives to a Volume, or Pool depending on whether I use UFS or ZFS.

Creating Volumes or Pools which are used to store files on was very easy. Clicking on Storage and then ZFS Volume Manager allowed me to create a new volume with the 2 500 GB hard drives that I had in my NAS, setting them up as RAID1 or Mirror configuration.

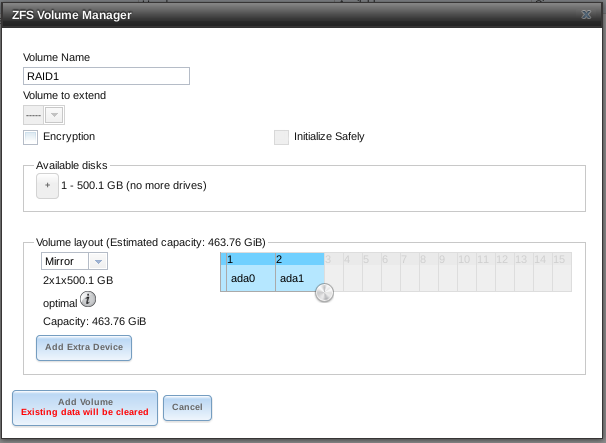
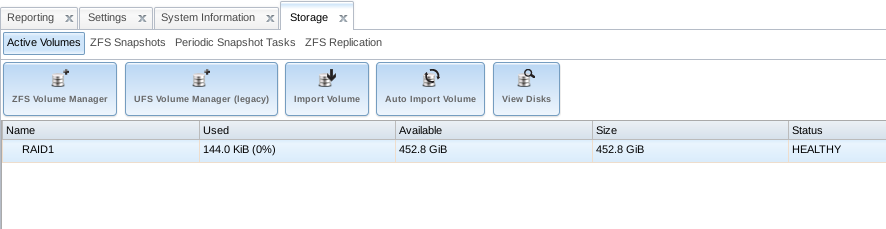
Once I’ve gone through the volume manager, I can see my new Pool sitting there waiting for me to dump some data onto it

I had other options too – I could have used only 1 drive for my NAS, or had 2 separate devices within that pool created.

Doing something fatal like detaching the volume painted the screen a bright red, instantly making me aware of the dangers of the action.


Don’t think I’ll be doing that just yet.

Volumes are mounted under the /mnt/ directory, so my just created RAID1 volume can be found under /mnt/RAID1/

It takes just a few clicks to create datasets. Datasets allow you to treat a subdirectory like a filesystem with access controls, compression, and snapshot ability.

Clicking on Storage at the top, then selecting RAID1, and then clicking the New Dataset button down the bottom brings up the new dataset window.
Enter in a name, click add dataset, and it’s created !

Now, time to setup some shares so I can dump data onto the NAS.
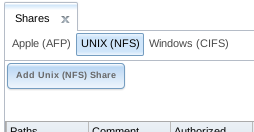
Clicking on the big Sharing button brings up the tabs for Apple (AFP), UNIX (NFS), and Windows (CIFS).
Since I don’t have any Apple or Windows devices, I’ll start setting up a NFS share.
Clicking on the UNIX (NFS) tab gives me a Add Unix (NFS) Share button.
Easy enough.

Clicking on that button brings up this window, allowing me to configure the settings for my new NFS share.

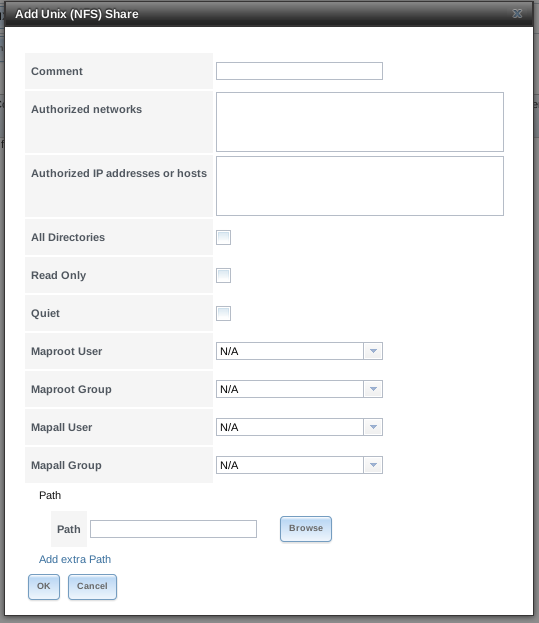
Setting up an authorised network, and the path that the share pointed to was easy enough.
After creating the new NFS share, it even asked me if I wanted to enable the NFS service.

After enabling it, I was able to poke it to see if it existed with the showmount command from another computer.

# showmount -e 10.0.0.201
Export list for 10.0.0.201:
/mnt/RAID1 10.0.0.0

As you can see, poking it showed that it was available.
I can now mount the NFS share with a simple command from any linux pc –
mount 10.0.0.201:/mnt/RAID1 /mnt/point

With it mounted, I can now copy and paste files to the NAS !

In my next post, I’ll have a look at FreeNAS’s plugins.

Share