In my last post, we set up ZeroTier as a basic mesh VPN, allowing access to any nodes that joined the network via their ZeroTier IP addresses. In this post, we will set be setting up ZeroTier to allow us to access our own network from the wider internet.
As an update to my old post – https://sirlagz.net/2016/01/20/live-resizing-lvm-on-linux/ – since utilites mature and change, tasks can get easier (or harder) as there are more commands and functionalities added.
In this instance, parted and lvm have been updated to make this a bit easier.
Step 1 – Resizing Hard Drive
This step remains the same. Expand the disk on your hypervisor, and if it doesn’t automatically update in the virtual machine itself, try running the following command # for x in /sys/class/scsi_disk/*; do echo '1' > $x/device/rescan; done
If the disk is still the same size in fdisk, then you’ll need to reboot the server.
Step 2 – Resizing Partition
Again we’ll need to use parted in this step, but the commands are a bit easier.
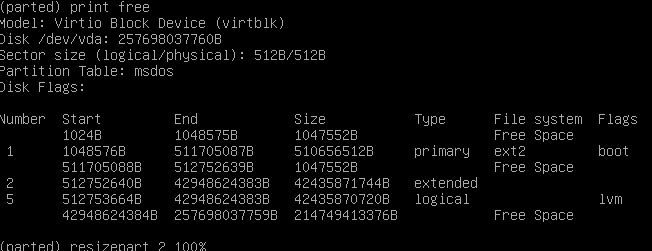
Run parted as root, and then run a print free command to make sure that you have space at the end of the partition.
You can see in my screenshot that my drive has some Free Space at the end
I need to resize both partitions 2 and 5 in my instance, but your situation may or may not be the same. Run the following commands to resize both partitions 2 and 5 to the maximum available space.
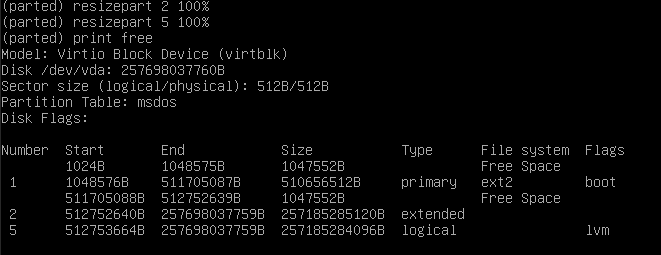
resizepart 2 100%
resizepart 5 100%
Now run print free again to verify that the partitions have been resized.
Run quit to exit parted.
Step 3 – Resizing Physical Volume
This is the same as before, do a pvresize to expand the physical volume to the maximum capacity. Make sure you’re specifying the correct partition.
pvrsize /dev/vda5
Step 4 – Resize Logical Volume and Filesystem
Now here is where it changes a bit. I don’t know when LVM got the ability to resize the filesystem as well (assuming it’s a filesystem that the utilities support. I use ext4 on most of my systems), but we can now resize everything in one go.
If you don’t know the path of your logical volume, you can check with the lvdisplay command
Run the lvresize command with the path to resize both the volume and filesystem in one go
lvresize -l +100%FREE -r /dev/VolGroup/lv_root
Now your filesystem will have been expanded to all available space on the disk.
I recently had to recover a dying USB stick that kept spitting out read errors. ddrescue‘s default parameters could only help so much as the flash controller would hang the instant it hit a bad read error, necessitating a unplug and replug of the USB stick before it could carry on.
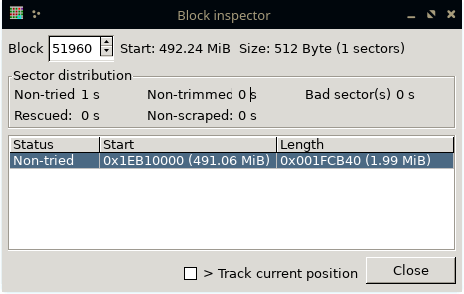
I decided to hack up a little script so I could recover select areas of the USB stick first and control what blocks ddrescue was attempting. Using ddrescueview, I could see which blocks had and had not been attempted. Using the information from the Block Inspector, I could obtain a hex address of the block I wanted to start from.
Block Inspector
Copying the text from the blocks into my hex-to-decimal script gave me a block to start from.
That block number lets me use the -i parameter to set a starting point and -s to set sector size. Then I use a loop to scan through a certain amount of blocks at a time
START=514916352;for x in {0..20000}; do echo $(($START+512*$x)); ddrescue -i $(($START+512*
$x)) -a 1024 -s 512 -O -d /dev/sdx imagefile mapfile; if [[ $? -gt 0 ]]; then START=$(($START+512)); break;fi; done;START=$((
$START+512*$x+512));echo $START;
I finally got around to playing with the Telstra SMS API some more after very successfully using it to send messages from my Zabbix instance at home.
I wanted to get responses from the messages so that I could potentially automate some responses if I get an alert via my Zabbix instance. Continue reading »