I recently bought a Telstra Prepaid (ZTE MF823) 4G stick to use while I’m out and about. It works great for internet, getting a nice 20Mbits in some locations, but I’ve run into some issues with the IP addressing scheme of the stick’s network.
The stick itself acts as a network interface card (NIC). When I plug it in, it creates a virtual network card, which is then assigned an IP address by the DHCP server that runs on the stick.
The default IP range of the stick is the 192.168.0.x network, which is fine when I’m out and about, but not so fine when I try and connect to a VPN service that also uses the same network, and this can cause some routing issues.
The solution to this is to change the IP network that the USB stick uses. This can be done because the USB stick has a mini Linux distribution that acts as a router. You can access this linux distribution by using a telnet client to connect to 192.168.0.1.
The default credentials are:
username: root

password: zte9x15
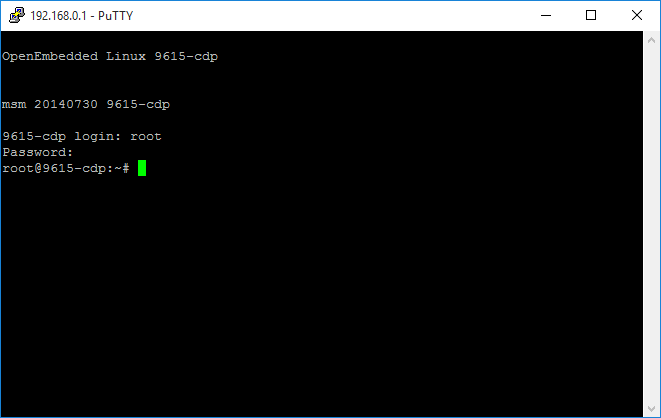
I’ve used putty in this screenshot where I am connecting to the USB stick.
When you’re typing the password in, you won’t see any feedback for security reasons, so just hit enter after typing the password.
Once you’ve logged into the USB stick, you should be presented with something like this:
You can change the IP address of the USB stick by modifying the userseting_nvconfig.txt file (Yes, with one t).
The file is located in the /usr/zte/zte_conf/config directory.
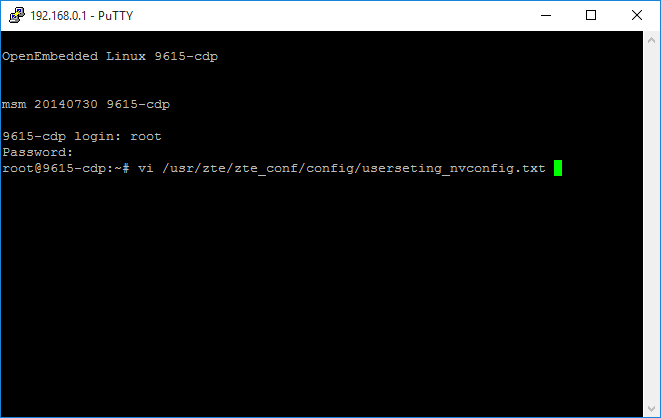
To modify the file, you’ll need to use the vi text editor.
root@9615-cdp:~# vi /usr/zte/zte_conf/config/userseting_nvconfig.txt
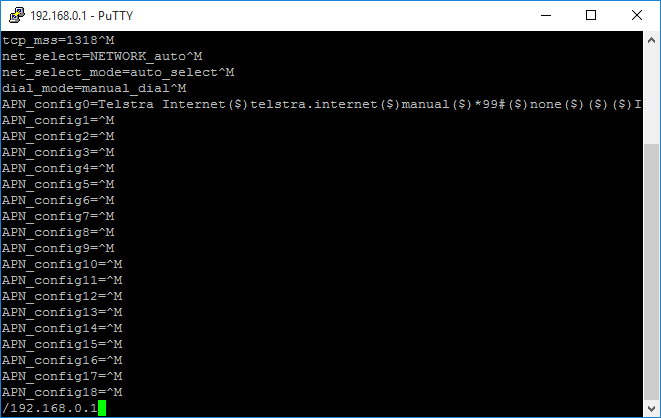
You can search for the current IP address by hitting the / key, and typing in 192.168.0.1 and hitting enter. Find the next match by hitting / and pressing enter without typing anything in.
Once you’ve found the couple of lines that mention that IP address, you can update them by moving the cursor over the number you want to change, hitting r, and then typing the new number.
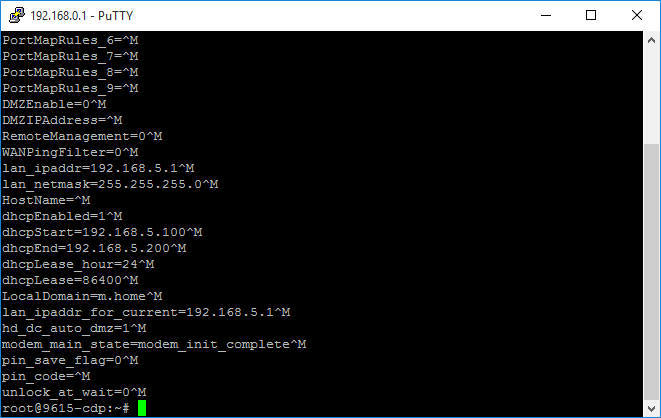
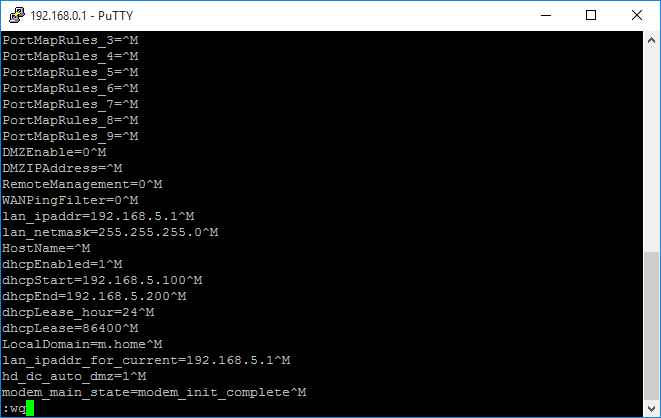
In this example, I’ve changed them to use the 192.168.5.x subnet –
You’ll also need to change the dhcpStart and dhcpEnd lines to reflect the new IP address range that you are now using the MF823.
Once you’ve updated the lines, save the changes by typing :wq. This should drop you back to the command line.
After you’ve updated those lines, unplug the USB stick and plug it back in.
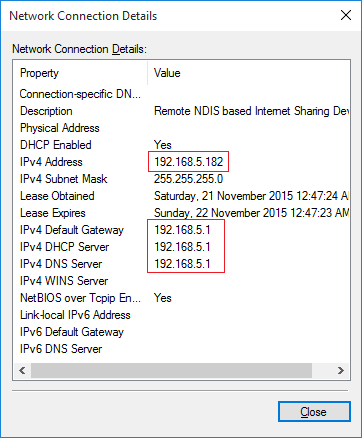
When you plug it back in. You should now be getting an IP address in the range that you’ve configured.
As you can see from the screenshot above, I now have a 192.168.5.182 IP address, not one in the 192.168.0.x IP address pool, which will make things easier if I’m trying to access VPN resourcs!

Many thanks for this! Saved us during ADSL outage at work.