I’m a Dad/Electrical Engineer/Tinker/Hacker/Woodworker/crazy hobbyist and I’m always building weird projects. I thought my latest project “RPiKids” was worth sharing with everyone. I have young kids with NO exposure to console gaming. I wanted to build them a system that was not just fun, but a system that could begin to explain at least the hardware fundamentals of computers. Watching their little faces soak in the Linux command line kernel unpacking, installing all sorts of subconscious goodness has been a real joy!
A single project involving the Raspberry Pi (Embedded Linux), Arduino (8-bit micro controller), woodworking, laser cutting, 3D printing, salvage, Fiberglass and Bondo ?!?!
The project revolves around the Arduino Uno implement parental controls. Using a digital encoder and a NeoPixel LED ring, the user (parent) enters in a combination. If the combination is entered correctly then it goes into “Timer Mode” and using the encoder, the user can set the amount of playtime in ten minute increments or enter the elusive “Unlimited Time Mode”. Once time is entered, The Arduino flips the relays and everything else is powered up.
When playtime is up, the Arduino issues a shutdown command via USB/Serial connection to the Raspberry Pi where a Python daemon program is awaiting the message. The Pi’s Python daemon then gracefully shuts down and the Arduino waits for an appropriate time before opening the relays and disconnecting the power. This way I can be sure the SD Card is not being corrupted by constant power cycling.
I quickly found out that the Pi definitely needed a DAC (I2S) sound card and I also souped it up with heat sinks because it was getting quit warm (even though there are two 5 volt computer fans on the case). The Pi has a WiFi USB dongle and games/configuration can be administered over SSH sessions.
I wanted a durable case that looked clean and protected the internals from anything my kids might throw at it (literally). So the case was constructed from 5/8″ Baltic Birch plywood and hangs from a hidden French Cleat on the back on the case. The front panel is made to come off for servicing and is constructed from 1/4″ hard board. The computer speakers and laser cut trim rings where grafted into the front panel, then wrapped with fleece, coated in fiberglass resin, three light coats of Bondo, sanded and painted with an HVLP spray gun. All the fasteners have stainless T-Nuts so the wood doesn’t get stripped during assembly/dis-assembly.
I hope you all enjoyed this project, please ask questions if you have them. For more details/information on this project check out my blog: http://www.buildxyz.xyz/
Many thanks to the Madman for being a great host on his blog!
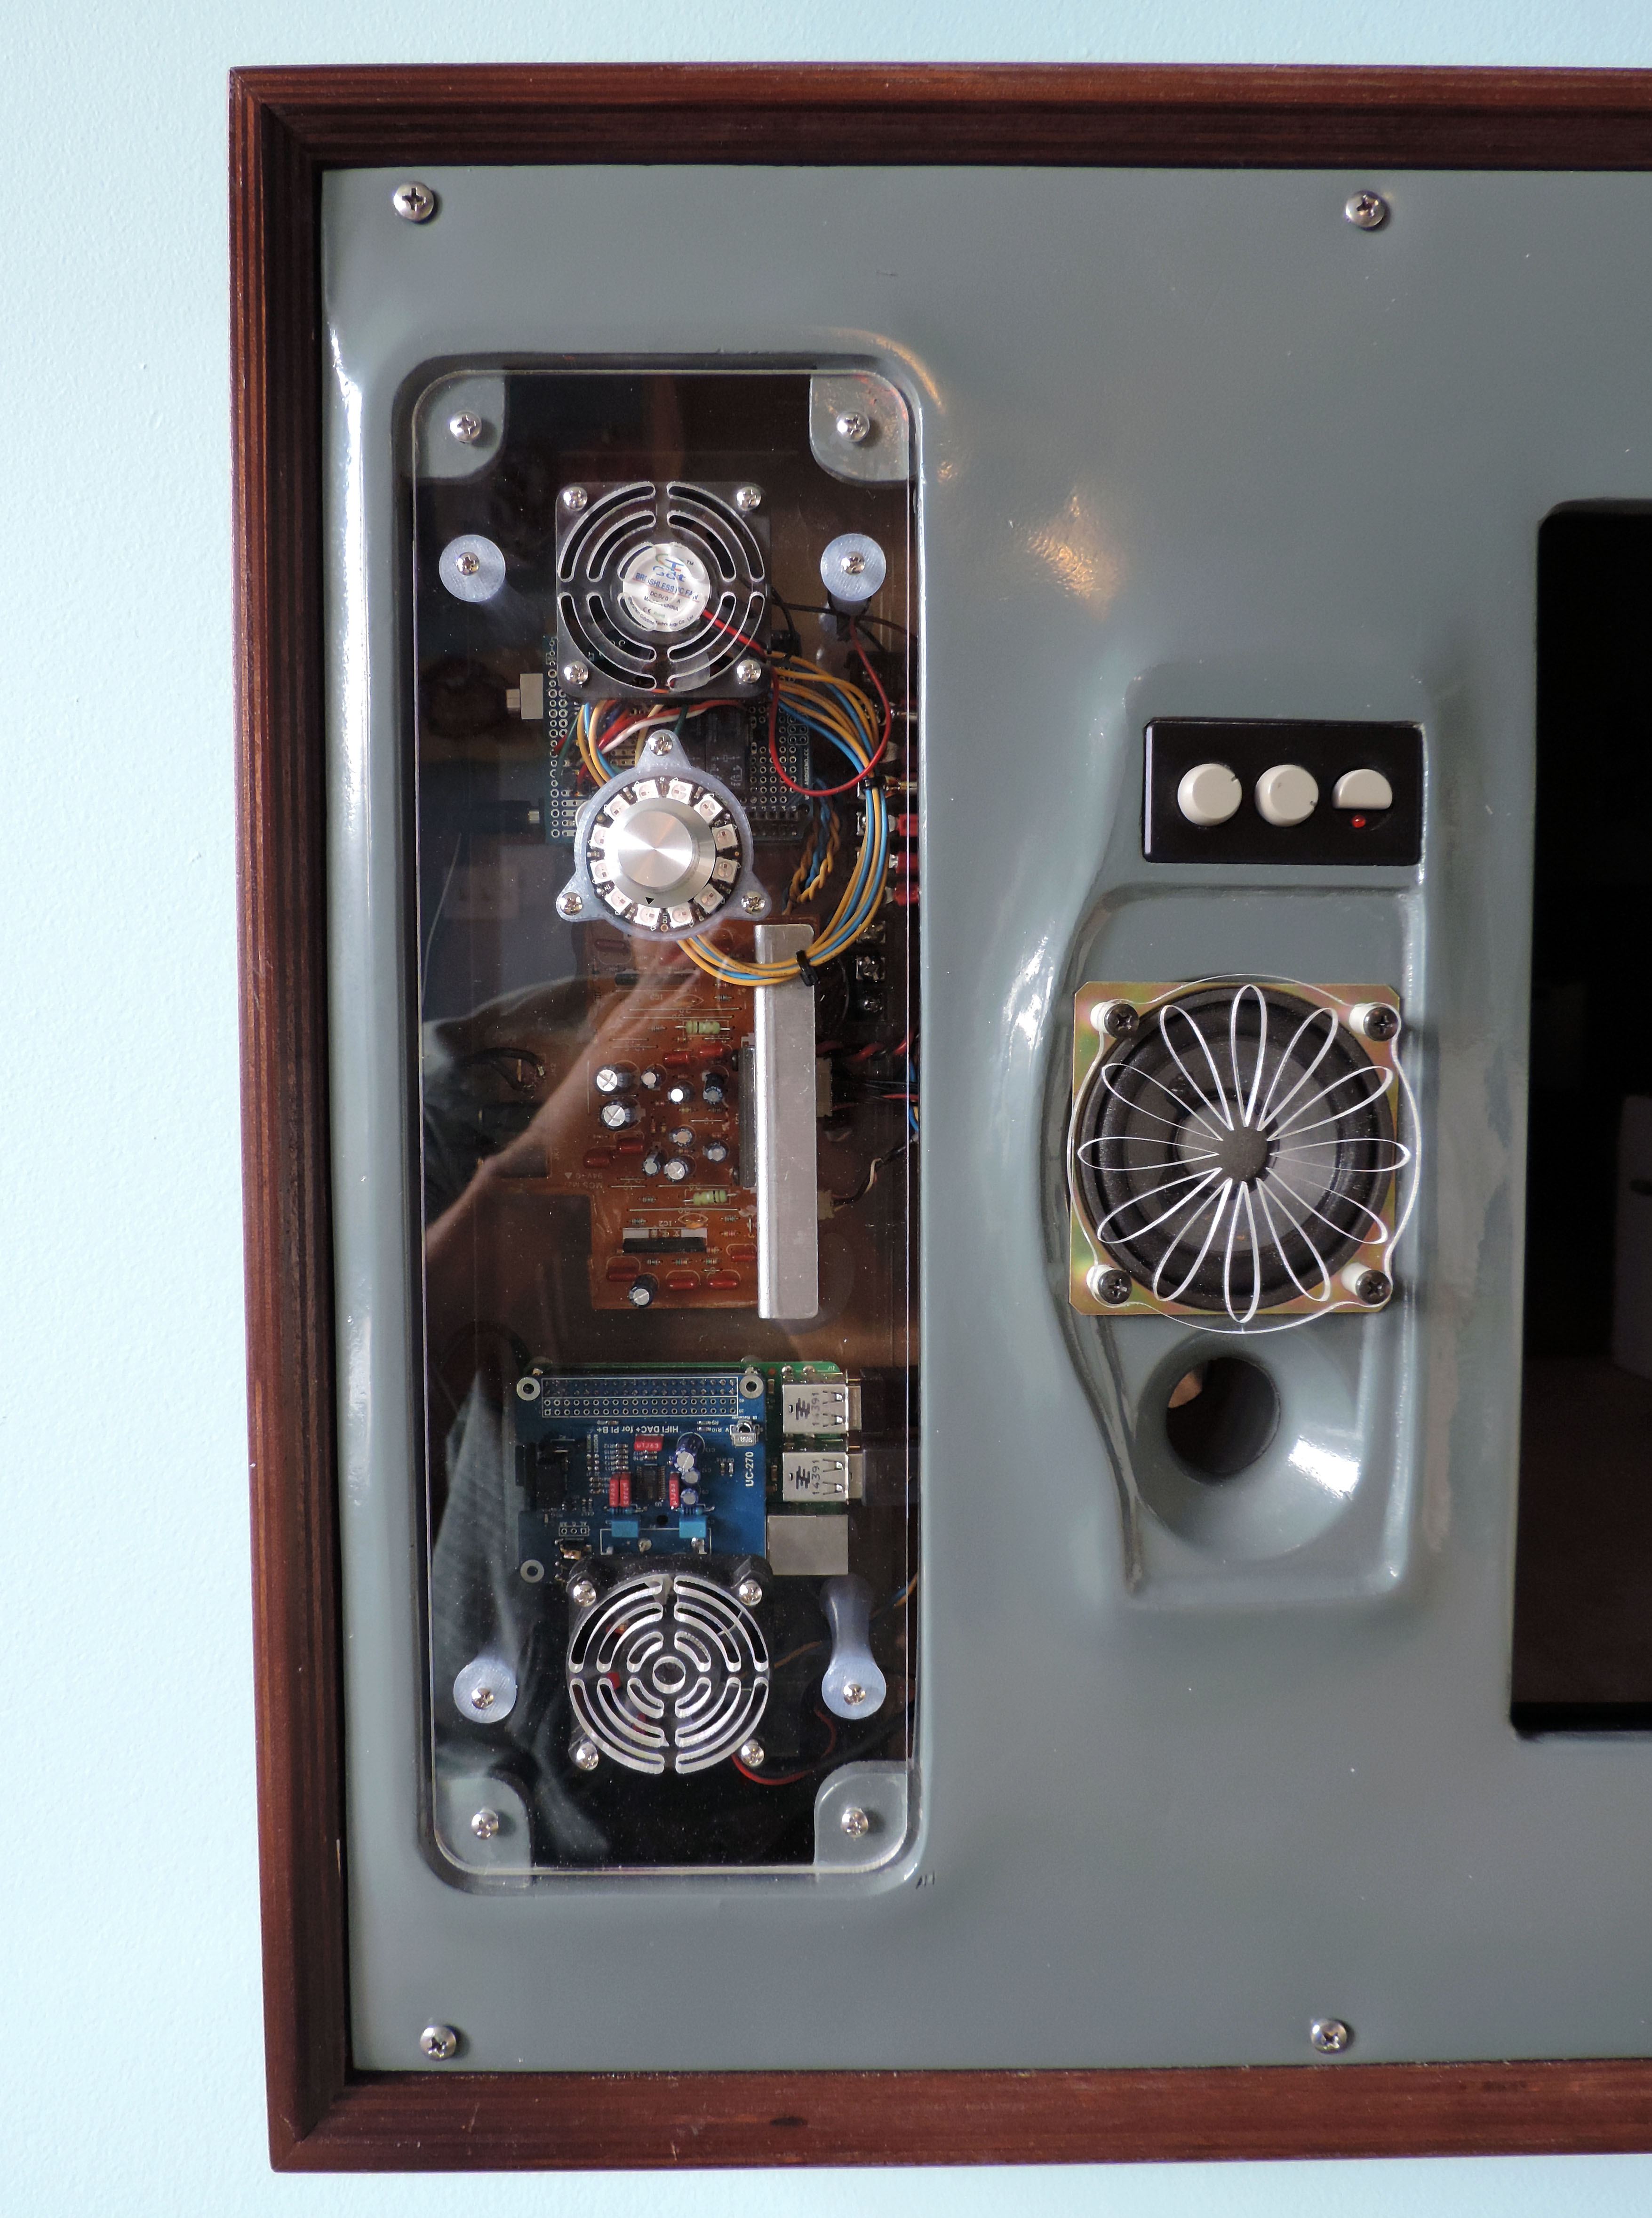
Close up of the front panel
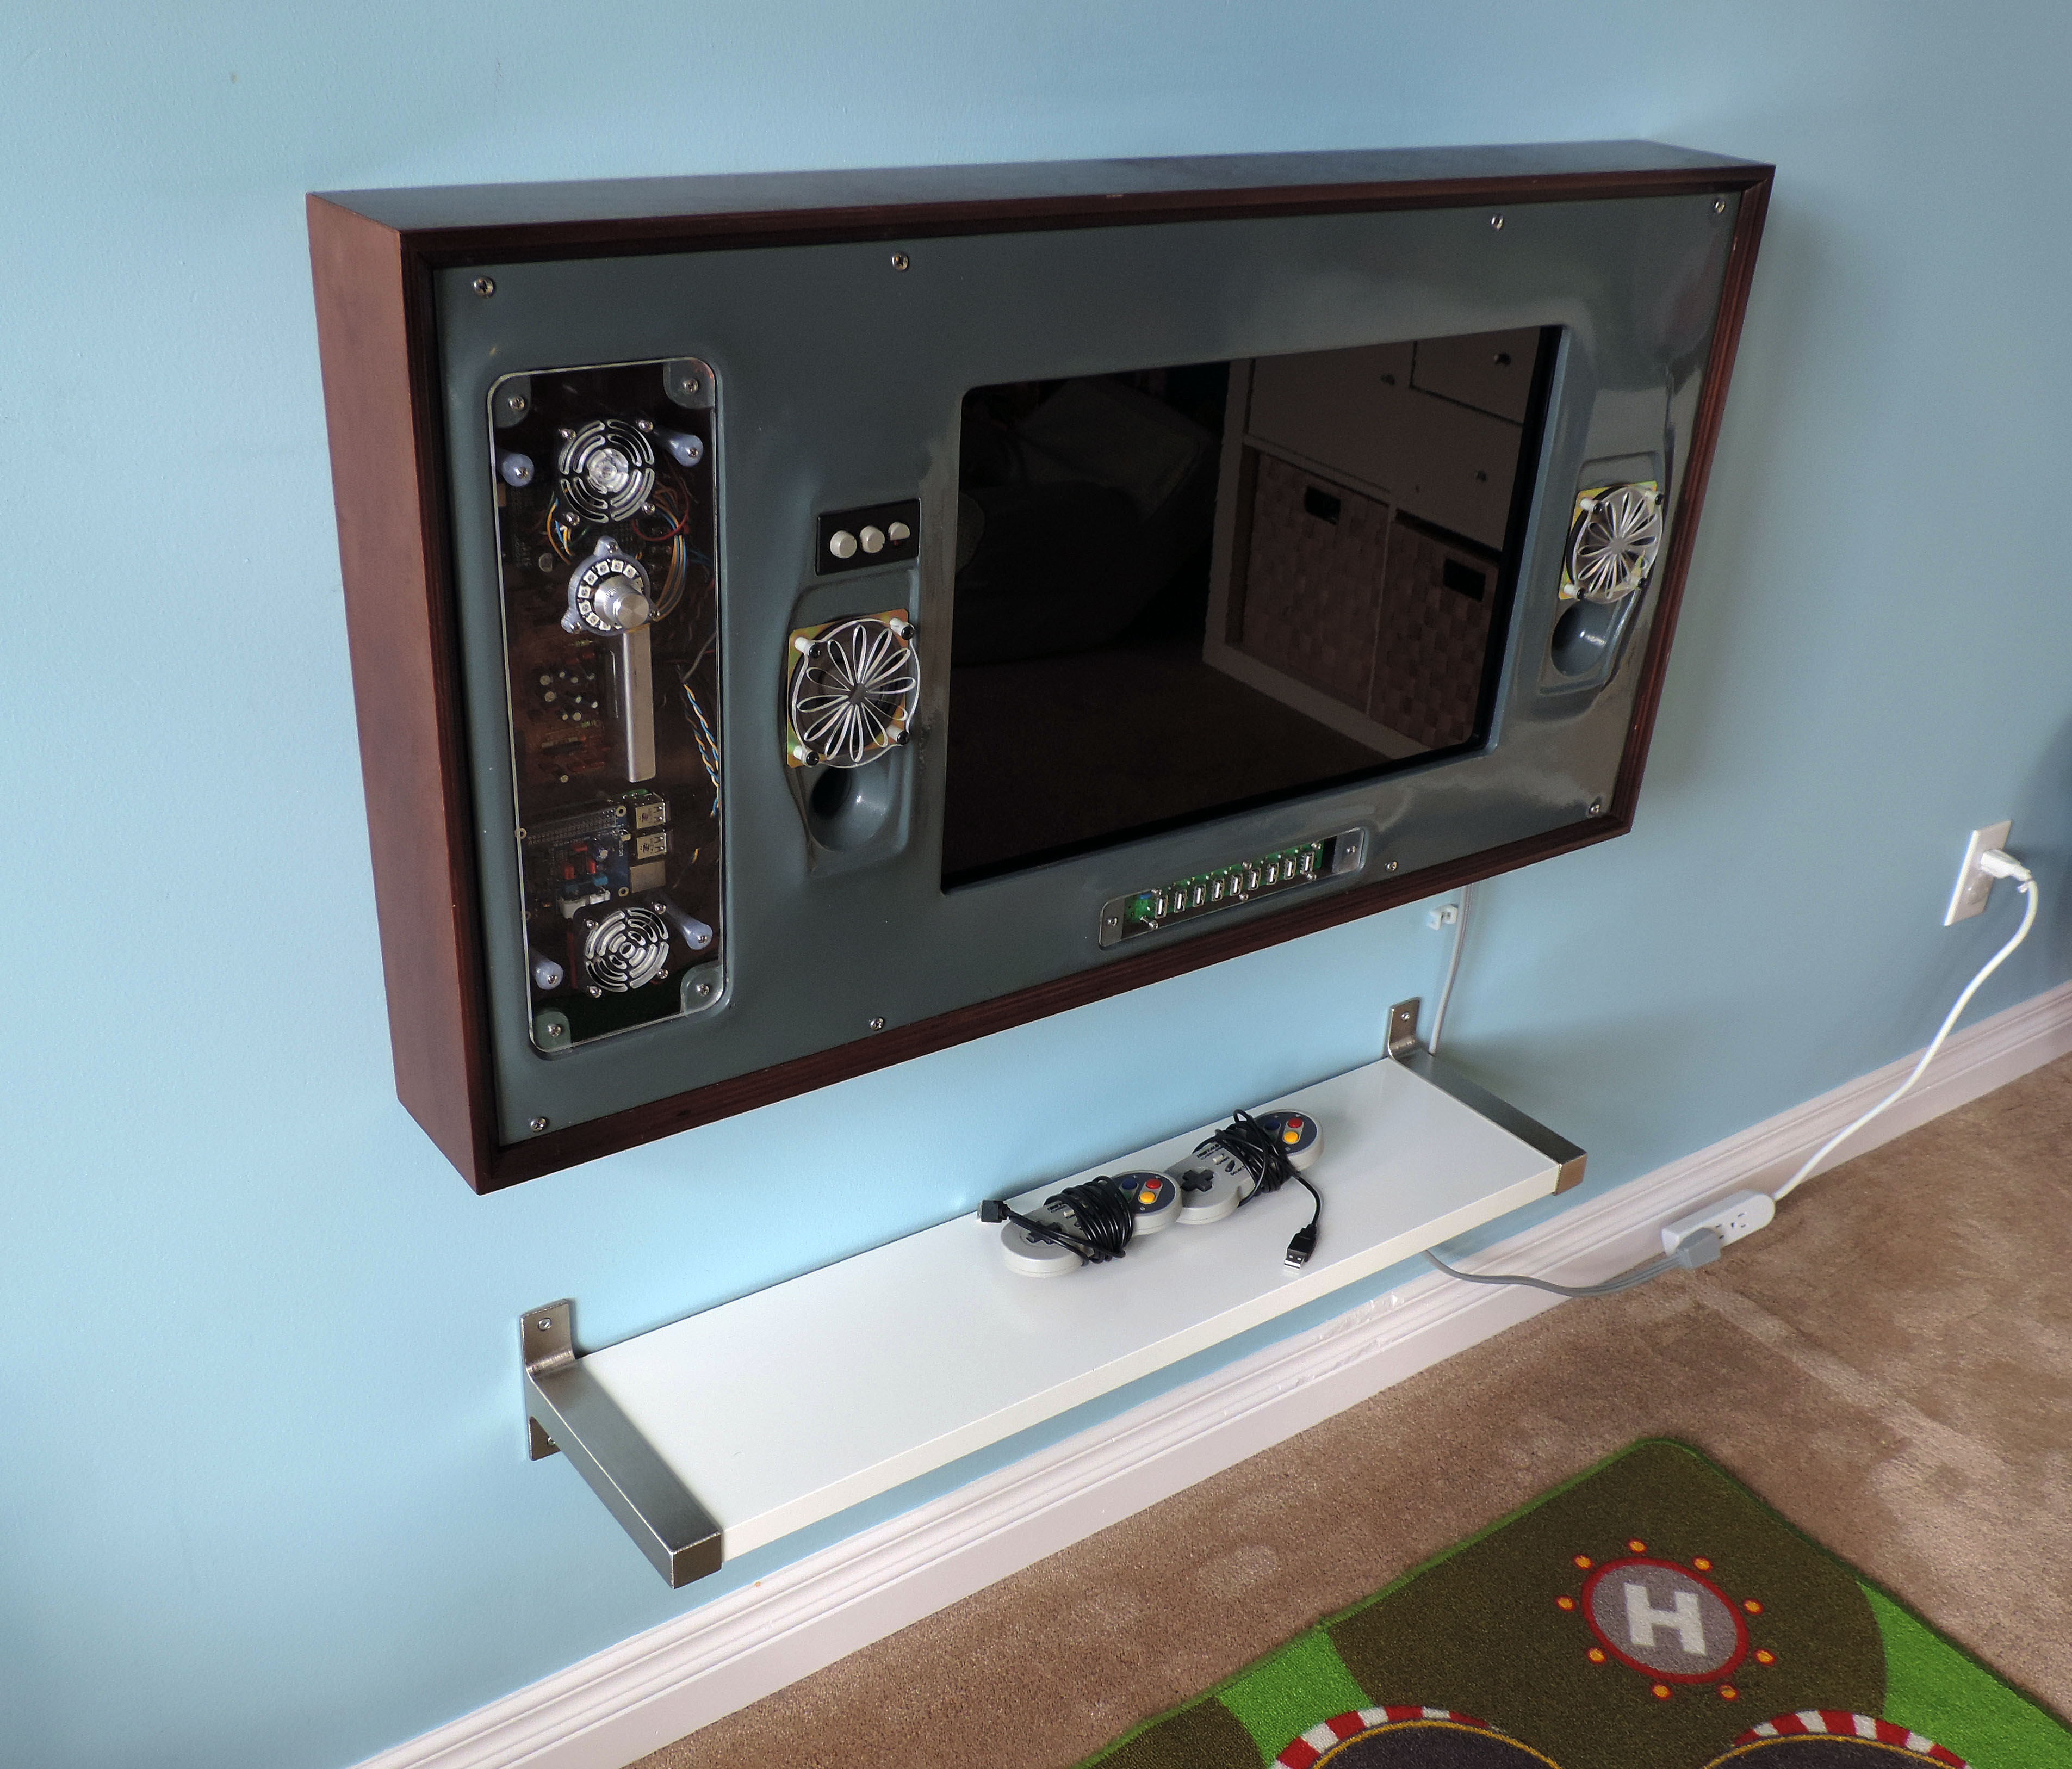
RPIKids mounted on the wall
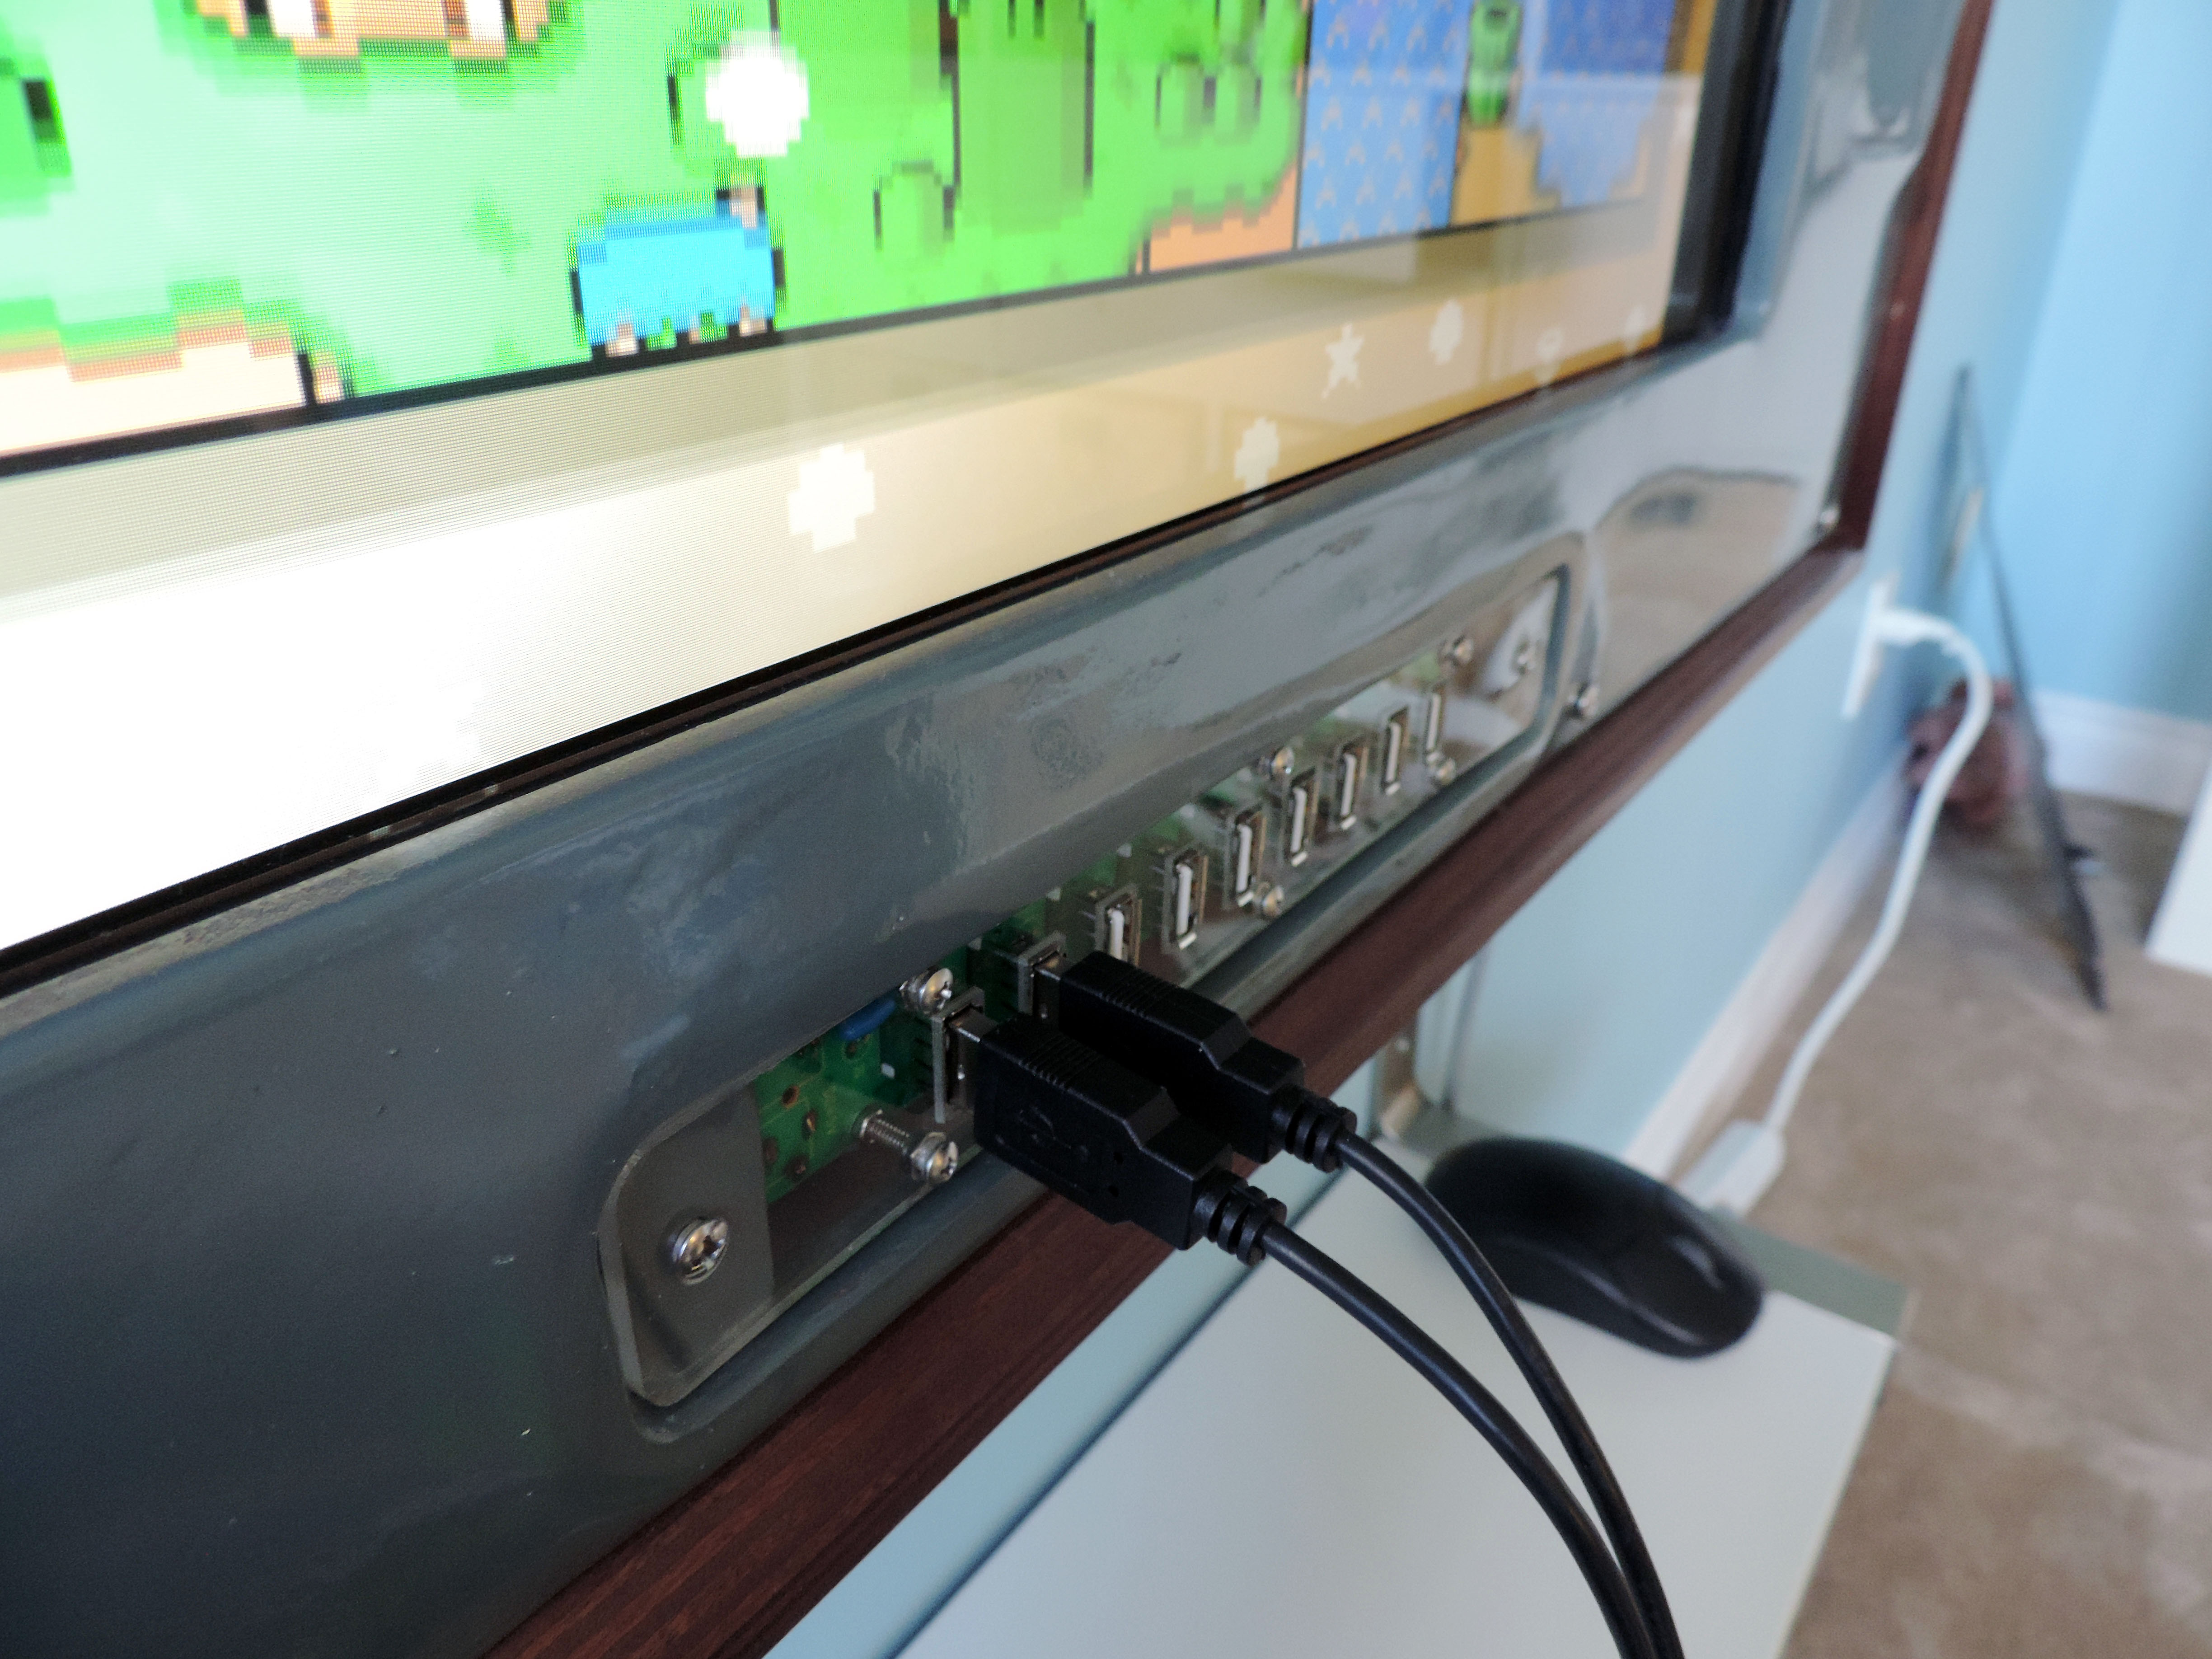
Close up of the 10 USB Ports
