I wrote a post about ExaGear Desktop a while ago where I looked at using it to run some basic X86 apps on a Raspberry Pi. It looked interesting, but I lost access to the Raspberry Pi 3 I was using to test it so I was unable to do too much with ExaGear.
However, with the release of ExaGear Desktop 2.0, I have my own Raspberry Pi 3 to play around with so I can give it some decent testing.
ExaGear Desktop 2.0 gives users the power to run OpenGL applications on the Raspberry Pi.
What this means, is that you can now play x86 games on the Raspberry Pi, or even run some applications that require OpenGL on the Pi.
For example, the first thing I did with mine is to install Steam onto my Raspberry Pi 3.
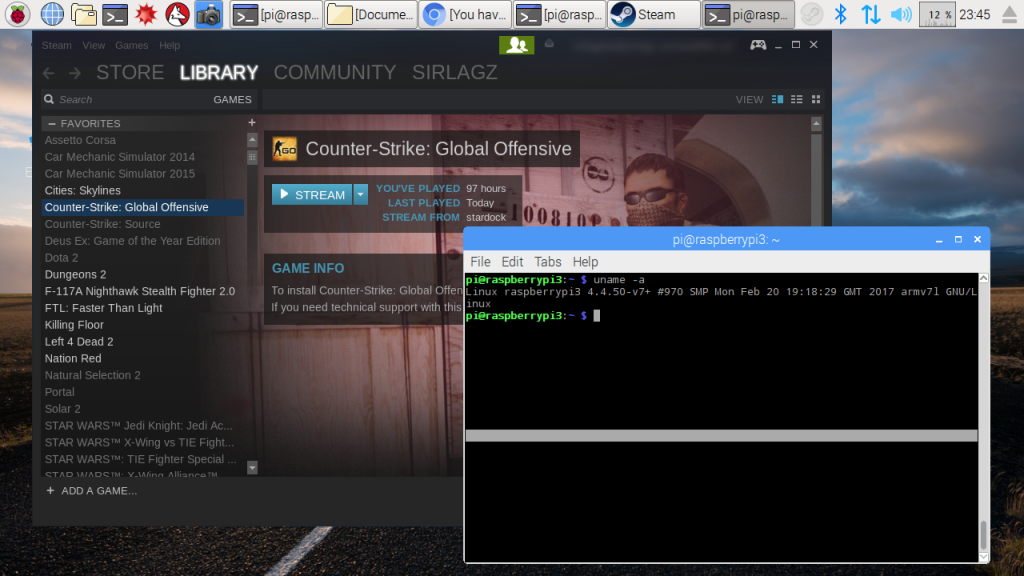
Steam running on my Raspberry Pi 3
Installing ExaGear
Installing ExaGear is relatively easy as long as you have a fairly quick internet connection as the initial download is approximately 400 megabytes.
You’ll also need at least a 16GB SD Card to use ExaGear as it requires a whole operating system image to run.
Before you install it, you need to enable the OpenGL Driver via raspi-config, and also expand the swap file just in case.
Expanding Swap File
The default swap file is only 100MB. I’ve expanded it to 500 just in case.
sudo nano /etc/dphys-swapfile
In that file, modify the line CONF_SWAPSIZE
CONF_SWAPSIZE=500
Close and save the file.
Enabling OpenGL Driver
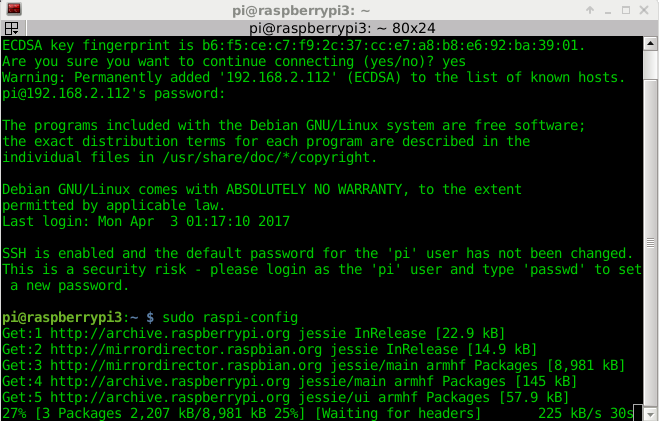
You’ll need to use sudo to run raspi-config from the terminal:
$ sudo raspi-config
You should see a blue screen with options in a gray box in the centre, select ‘Update this tool to the latest version’:
Updating rpi-config
You’ll see it do an update:
rpi-config updating itself
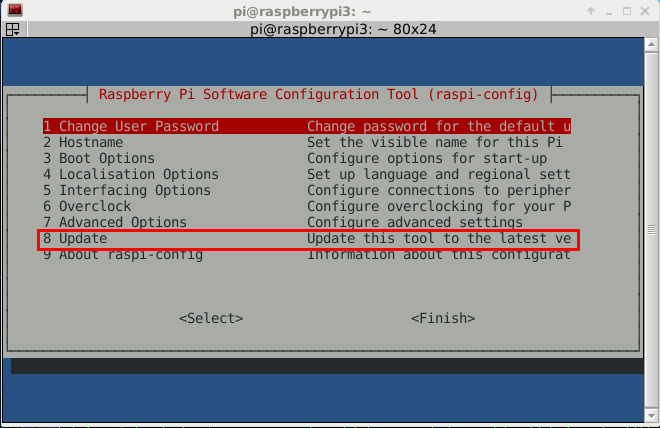
Once the update is done, you’ll be back onto the main menu. Select Advanced Options:
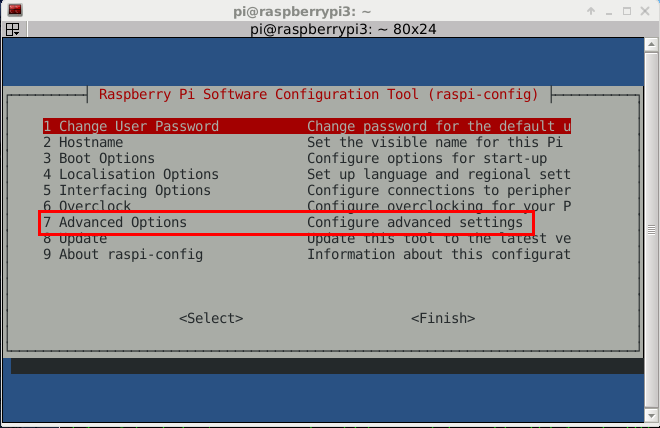
Choosing Advanced Options
In ‘Advanced Options’, select ‘A6 GL Driver’
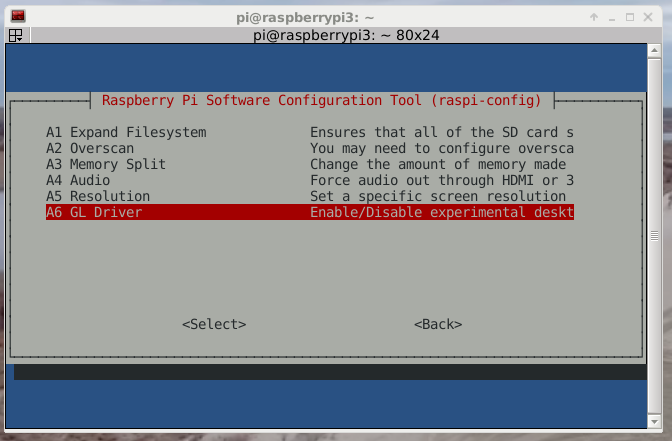
Selecting the GL Driver
In the GL driver selection, you’ll need to chose the ‘G1 GL (Full KMS)’ Option
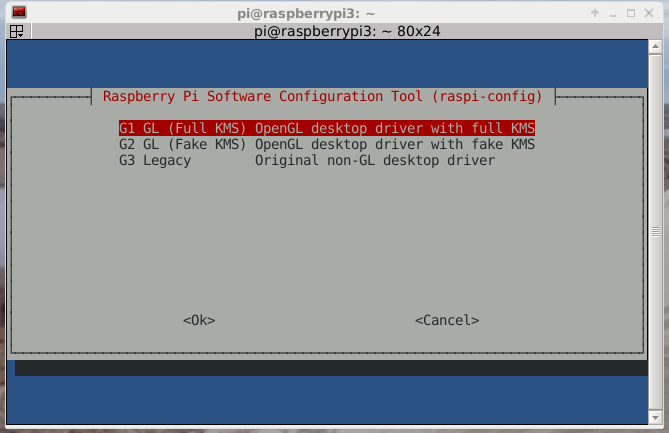
Selecting the Full GL Driver
Once this is selected, you’ll get a confirmation screen. Select
Installing ExaGear Desktop
Once you have downloaded ExaGear, it’s a simple matter of untarring the file, and running ./install-exagear.sh. This script will use an appropriate system image and install ExaGear.
When you download ExaGear, make sure you save the file and the license into the Downloads directory.
$ cd ~/Downloads

$ tar -xvzf exagear-desktop-rpi3.tar.gz

$ sudo ./install-exagear.sh
After ExaGear is installed, you can either run the exagear command, or click on the ExaGear icon on your desktop.
What’s Next?
Next post, I’ll detail how to install Steam and some Steam games to demonstrate the ability of ExaGear on a Raspberry Pi 3.
