I recently saw a $5 NAS at my local MSY store. At first I couldn’t believe my eyes, $5 for a NAS?
Surely they were mistaken, and the price was just an error. But sure enough, it scanned as $5 and I was on my merry way shortly after I paid for it.
When I got home, I inspected my Cheap and Nasty find – a Ritmo branded external hard drive enclosure that could be connected via LAN or USB.
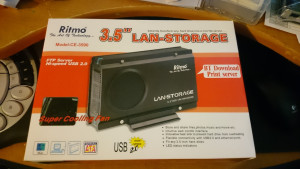
The box tells me that it can Store and share files, has an intuitive “wed” (I think they mean web…) control interface, a heatsink to prevent the drive from overheating, can connect with both USB and Ethernet, fits any 3.5 inch hard disk, and has LED Status indicators.
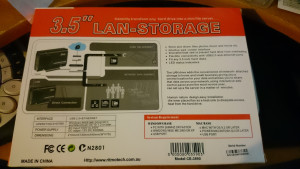
Let’s open the box shall we?
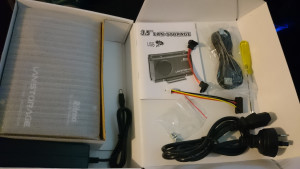
Inside, you get:
- The NAS itself
- A yellow handled screw driver
- 4 Hard drive screws
- A short SATA Data cable
- A short SATA Power cable
- A standard kettle power cord
- A 12V 3.5A power brick
- An instruction manual
- NAS Stand
- Drivers CD
- Ethernet Cable
Installing a hard drive is a simple matter of undoing the 4 screws on the blank side of the nas, undoing the 2 screws on the back side of the NAS, and then sliding out the side covers. On the side of the NAS are the mounting holes for the hard drive.
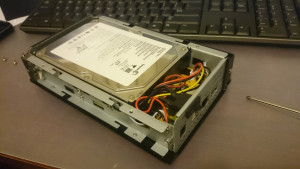
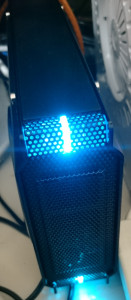
After installing the hard drive and re-installing the covers, I connected the NAS to my network, and to its power supply, plugged it in and powered it on. I was expecting a bang, but was (un?)pleasantly disappointed. The NAS boots up with some bright blue lights on the front to indicate that it is powered on and ready to service me.
I got the NAS IP address from my router, and logged onto the web interface.
I was greeted by something that looked like it was from 1999.
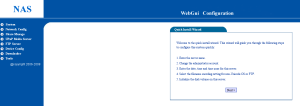
I skipped the installation wizard to jump straight into the guts of the NAS. On the left hand menu under System, I could set up the Web Admin username and password, set up the time of the NAS, and also set up some other options on the NAS itself.
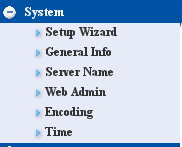
The Network Config menu let me set whether the NAS uses DHCP to get its IP address or I could set a static IP for the NAS. It also comes with a DHCP server and a Dynamic DNS client, however the client seems to only be for changeip.com.

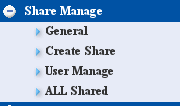
The Share Manage menu lets me configure the Windows shares on the NAS. Since I don’t have many Windows machines, I haven’t set any shares up.
The UPNP server lets me set up where the DLNA server will get its media from. This seems to work well enough to stream SD content. Some HD Content seems to stream with a bit of jitter, but otherwise still watchable.

There’s also a FTP Server setup. This is what I’ve been using to get files on and off the NAS.

Performance of the FTP server is rubbish, however for $5, what can you expect?
I tested the speed by copying a 100 megabyte file to and from my desktop computer.
I got a fairly constant 5 megabytes a second when I was copying to the NAS.
Copying from the NAS back to my computer was done at a slightly lower 3 megabytes a second.
CPU usage when copying to and from the NAS was quite high, which probably contributes to the low read/write speed.
Device Config lets you see how much space is used on the hard drive, what hard drive is in the NAS, and also allows you to eject the Hard drive…I guess that means that theoretically you could hot swap the drive ? I’m not sure yet.

The Downloader is the Bittorrent client. It seems to be included just so it can be advertised as a feature. The CPU on the NAS itself won’t be able to do more than 1 bittorrent download at a time. I added 2 torrents to the list and the CPU was pegged at 100% the whole time the 2 torrents were downloading.

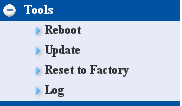
The tools menu allowed me to reboot the NAS, update it (No idea where I would get firmware from), Reset it to factory defaults, and show the log file. My log file seems to only contain logs from the FTP server.
For $5, this is a bargain, if the power supply holds up. There are features on the NAS that are actually useful, even though this NAS seems to be from 2010 judging from the firmware version. I’m using it to store some files that aren’t important enough to backup, but take enough space on my desktop to bother me. It takes a little while for the files to transfer, but once the files are there, the NAS is sitting there happily serving me the files when I need them.
The only feature lacking from this NAS is NFS support. If it had that then I’d be a happy camper, but even without NFS support, it serves its purpose of sharing out an old 200GB SATA drive that I had lying around doing nothing.
Tune in next week to see what else I can make this NAS do

