Configuration of the Camera
By default, the camera has a 192.168.1.10 address. If you don’t already have a network in that range, then you will need a device within the 192.168.1.0/24 range to even start configuring the camera.
The web interface requires Internet Explorer as it uses ActiveX for some odd reason. Windows 10 won’t even allow the ActiveX plugin to be installed as it’s unsigned. The login page allows you to download what I assume is a plugin from an external site, however you can also add the camera web interface to IE’s trusted sites list and enable ActiveX controls to allow you to view it on Windows 10.
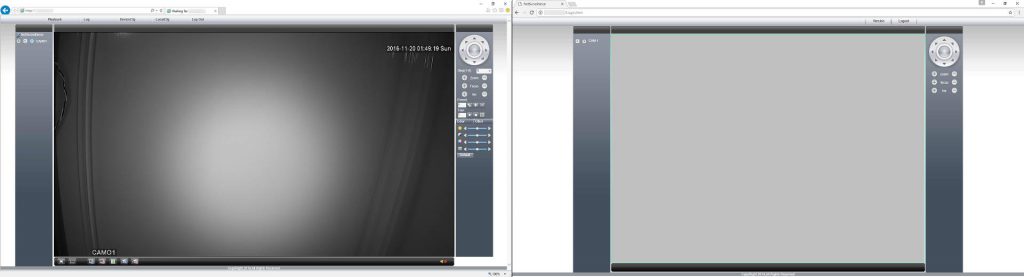
You can see the differences in the interface with IE on the left and Chrome on the right. Chrome is missing a lot of functionality that is present in IE.
The menu options in IE are pretty self explanatory, but the interesting one is DeviceCfg. This menu brings up the configuration for the IP Camera, with Alarm, Record, System, Advanced, and Info as sub menus.
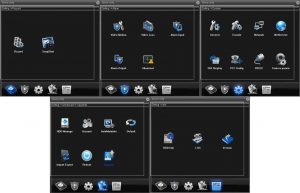
The five configuration screens available under ‘DeviceCfg’ . Looks very much like a DVR interface rather than a IP Camera interface.
Most of the menu items are pretty self explanatory.
The useful ones are System -> Encode which lets you configure the camera Main Stream and Sub Stream quality/encoding settings, System -> GUI Display which lets you change the onscreen text display and also allows you to setup ‘covered regions’ where the stream is blocked.
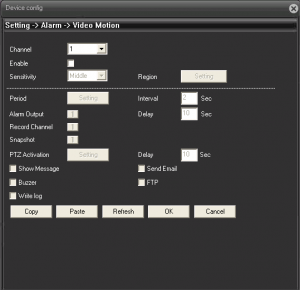
The Motion Detection configuration panel isn’t overly complicated. PTZ Activation doesn’t really make sense here, and neither does buzzer as I don’t see a buzzer on the camera…
The Setting -> Alarm panel allows for configuration of the Alarms and Motion detection. From first impressions, it seems pretty flexible with the Motion detection able to set detection regions, sensitivity, and schedules. Strangely it also features PTZ options where none exists on this camera, and there doesn’t seem to be a way to connect any controls to the camera. Perhaps it’s just not exposed?
The email and FTP server settings also need to be configured before the email and FTP functionality will do anything. I’m assuming the Alarm Output, Record Channel, and Snapshot buttons are buttons to enable the functionality, though why they used buttons rather than checkboxes I’m not sure. I’m guessing it’s because the software used was meant to be for DVRs, so there would be more than one button if the DVR was recording more than one camera.
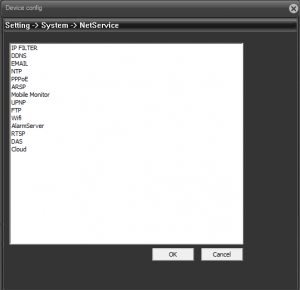
The options available under NetService. You can disable things like UPnP, setup PPPoE clients, an awful lot of functionality!
Another useful option is System -> NetService. This allows you to configure certain services on the IP camera, like dynamic DNS updates, NTP servers, Email servers, the Cloud service, even an IP Filter, which would be useful if you were planning on allowing this camera onto the internet. The Email server settings are for alarms to send an email out while the FTP settings are for the alarms to write to a FTP server. Some of the other options are a bit harder to decipher, not too sure what DAS, Mobile Monitor, or AlarmServer are for.
